You need a place to unwind. After a long day, the patio or deck becomes your escape hatch. It’s where you host friends, watch the kids play, or just sit in silence. A well-built outdoor space isn’t just a pretty face for your house; it changes how you live in it.
But building it from scratch or renovating an old one isn’t just about buying lumber. It’s a puzzle. You have to weigh your budget, your yard’s terrain, and exactly how you intend to use the space. Is it a quiet corner for reading? Or the main hub for weekend barbecues? The answer dictates everything else.
Start by looking at your household. A family with toddlers, teenagers, and a dog has very different needs than a couple who likes a low-key evening drink. Think about the traffic flow. Do you want a deck that acts as a simple transition between the back door and the lawn? Or do you want an “indoor-outdoor” room that feels like an extension of your kitchen?
This isn’t a step-by-step carpentry manual. It’s a portfolio of ideas. We’re looking at classic, timeless setups and modern, daring designs. The goal is to find the right fit for your home, your budget, and your lifestyle.
How to Match Your Deck to Your Home’s Style
You don’t need to match the siding on your house exactly. That’s a rigid rule with no real benefit. Instead, aim for harmony. The materials should complement the mood of your home. If your house is traditional, a rustic cedar deck might fit. If you have a modern minimalist build, composite materials or clean steel railings might work better.
Balance is key. You want variety in color, form, and texture to keep the look interesting. A monotone deck can feel boring. A chaotic mix can feel messy. The sweet spot is a unified appearance that stands on its own but still feels like it belongs where it is.
A successful deck integrates diverse elements into a functional and aesthetically pleasing whole that harmonizes with the house it serves and the yard it adjoins.
Consider these factors before you cut a single board:
- Site Conditions: Is your yard flat? Sloped? Rocky? The terrain often dictates the structure type.
- Budget: This determines the size, the materials, and the amenities you can add.
- Usage: Is it for dining, sleeping, or just lounging?
- Personal Taste: Do you prefer a dark stain or a light natural finish? What style of railing do you actually like looking at?
The site is often the deciding factor. If you’re dealing with a steep slope, a floating deck or a multi-level design might be your only option. If your budget is tight, you’ll focus on durability and basic function first, saving the fancy lighting and built-in seating for later.
Following the Site, Up or Down
Terrain is the first physical constraint you must address. You can fight the slope, or you can work with it. Building on uneven ground requires careful planning. You might need to dig for footings, build a retaining wall, or construct a multi-tiered deck to follow the natural contours of the land.
If your yard is flat, you have more freedom. You can choose a simple ground-level platform or a raised structure for better views. But even on flat ground, drainage is a critical issue. Water pooling around deck posts will rot the wood and damage the structure. You need to plan for water flow before you start framing.
The style of the deck should reflect the specific challenges of your site. A hillside deck needs different structural support than a flat backyard platform. A narrow urban lot requires a vertical mindset, perhaps a stacked deck or a balcony-style extension. A sprawling suburban lawn allows for more horizontal spread and open-air design.
Don’t ignore the existing features. If you have a large tree you want to keep, build around it. If you have a view you want to preserve, orient the deck to face it. The environment tells you what to do. Listen to it.

Taming Steep Slopes with Multi-Level Deck Designs
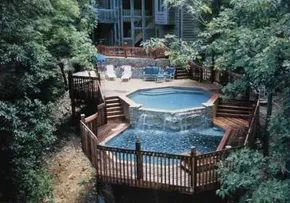
Steep terrain isn’t just a visual challenge; it’s a structural puzzle. If your yard drops off sharply, a single flat platform won’t cut it. You need to step down. Building a deck that cascades down a hillside is the most practical approach. It follows the land’s natural contour, keeping the footprint manageable while creating a visually interesting tiered effect. Since most houses sit at the top of slopes rather than the bottom, your deck usually starts high and steps down. You might end up with a simple split-level setup or a series of three or four distinct platforms.
You can also build a single high-level deck cantilevered over a hillside. This works for smaller projects. Large elevated decks, however, create problems. They cast heavy shadows on the windows below. From the bottom of the slope, a massive overhang can make the house itself look small and dominated by the structure above. Check the sightlines before you commit to a single high platform.
Supporting the Structure on Uneven Ground
Steep grades demand robust understructures. Your foundation needs to handle varying soil conditions and support the weight of the deck without shifting. You will likely need deep post footings or concrete piers to reach stable ground. The framing between these support points must be rigid enough to handle the slope’s pull.
Don’t leave those bulky posts and joists exposed if you can help it. They look unfinished. Wrap the underside with cedar or redwood lattice, install vertical siding, or plant dense shrubs against the structure. This hides the mechanical bones of the deck and blends the construction into the landscape. It turns a utilitarian support system into a design feature.
On-Grade Decks Hug the Ground
When the slope flattens out, or when you simply want to minimize vertical complexity, on-grade decks are the answer. These structures sit flush with the finished grade of the yard. They don’t require deep footings or complex post-to-beam connections. The framing rests directly on the ground, supported by concrete blocks or ledger boards attached to the house.
This approach is faster to build and cheaper in materials. You don’t need to excavate deep holes for every post. You just need to grade the soil level and compact it. If the ground is uneven, you can use adjustable leveling blocks to shim the frame flat. On-grade decks are ideal for patios, small lounging areas, or as the top step in a multi-level design where the slope becomes gentle. They feel like an extension of the house floor, not a structure hanging in the air.
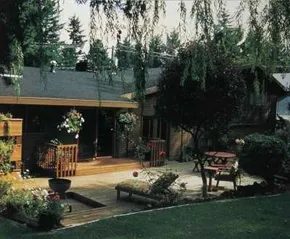

You don’t need a hillside or a massive budget to justify a deck. If your yard is flat or has just a gentle slope, an on-grade deck is the move. It keeps things simple. Design and construction stay straightforward, whether you bolt it to the house or build a freestanding pad in the middle of the lawn.
Size and shape are totally flexible. Square, rectangular, L-shaped. Your call. Since the structure sits close to the earth, you usually skip the railings. No steps, either. That simplicity makes on-grade decks perfect for single-story homes. A raised platform or a multi-level structure on a low-profile house can look like an eyesore. It overwhelms the building. An on-grade deck fits the scale.
Why You Should Elevate It Even a Few Inches
Some people try to build flush with the dirt. That’s a bad idea. Direct contact with the ground kills wood. Moisture seeps in. Decay sets in. If you insist on a flush build, you need materials that shrug off rot. Pressure-treated lumber is one option. PVC vinyl works, too.
But most sensible designs lift the deck slightly off the surface. Why? Two reasons. First, ground is never perfectly level. A few inches of elevation lets you navigate uneven soil without complex grading work. Second, elevation creates air circulation underneath the frame. It also helps water drain away from the structure instead of pooling under the joists.
DeStanding Free, But Fitting In

Blending Decks with Patios and Landscaping
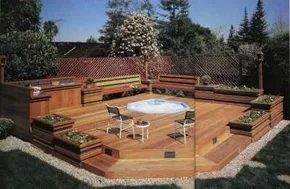
Freestanding decks work best when they don’t fight the rest of your yard. They are flexible. You can match them to your hardscape or make them stand out. Wood pairs well with brick, flagstone, and crushed rock. If the textures and colors line up, the deck feels like part of the same room as your patio. If you want separation, lean into the contrast. A wood deck next to a bright lawn or a distant stone patio creates clear zones. One area for sitting, one for growing, one for walking.
Keeping the Deck Connected to the House
Even if the deck is detached, it needs a visual thread back to your home. A gravel path works. A bark path works. A formal walkway or a small bridge works. In a big yard, the deck might not be visible from the front door. That is fine. But it should feel close. Within arm’s reach. If you have to walk a long way to get from the door to the deck, the connection is broken.
Using Levels to Solve Site Problems
Uneven ground is a common issue. You do not have to flatten the whole yard. You can build the deck at a different level than the surrounding land. This solves drainage issues. It keeps the structure dry. It also lets you adapt to slopes without excessive excavation.

How Multilevel Decks Fix Sloped or Cramped Backyards
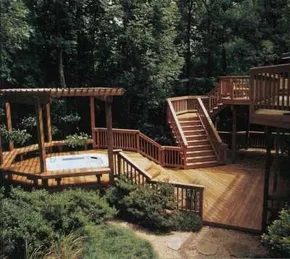
Steep grade. Rocky terrain. A yard that just doesn’t flow. These are the classic problems that make standard decking feel impossible. Multilevel decks solve this by stepping up or down the slope, turning a difficult site into usable space.
You can also use them to break up an awkward, cramped outdoor area into a progression of space-saving platforms. Or, if you have a large but boring yard, a succession of broader levels gives the space a new focus. The result is often better than your living room. Add built-in seating, planters, zones for sun and shade, and maybe a water feature. Suddenly, people actually want to go outside.
Why Material Continuity Matters for Multi-Deck Projects
Visual clutter is the enemy here. If every level looks different, the whole structure feels busy and disjointed. You need a unified appearance.
Repeat specific details to tie the levels together:
– The same railing style
– Identical platform shapes
– Matching bench designs
This creates rhythm. It stops the eye from bouncing around in confusion. It makes the structure feel like one cohesive piece, not a collection of random platforms.
Practical Steps for Designing a Cohesive Outdoor Hierarchy
Think about how the levels connect. A stepped design handles elevation changes. A tiered design handles space efficiency. Choose based on your site.
If you’re doing this yourself, lock in your materials first. Buying all the lumber, fasteners, and hardware in one go ensures color and grain match. This saves you from the nightmare of mismatched batches later.
Safety check: Steep transitions need sturdy steps. Non-slip treads are non-negotiable. Handrails must be secure. Don’t skimp on the structural supports for the lower levels, which bear more load.
The goal isn’t just to build a deck. It’s to build a room outdoors. One that people actually use.

Why Multi-Level Decks Work Better Than Giant Slabs
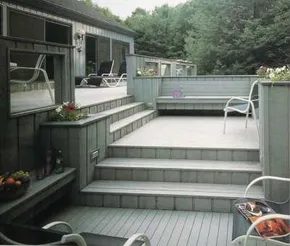
You might build a tiered deck to fix a sloping lot, but plenty of homeowners do it purely for looks. Breaking a massive platform into distinct levels makes the structure feel less monolithic. It softens the visual weight, creating a warmer, more inviting atmosphere that actually matches the scale of the house. Instead of one sprawling slab, you get a gradual transition that links the architecture to the garden.
Think of it as a bridge. The levels act as connectors within the landscape, guiding your eye from the porch to the lawn. They set the stage for specific landscaping styles, letting you tuck plants or define zones without feeling like you’re building a wall.
Designing Transitions: Planters and Patterns
You don’t have to rely on boring vertical spindles to mark a change in elevation. Built-in planters and seating can serve double duty. If you position them correctly, they replace the need for conventional railings entirely. The greenery becomes the barrier.
Play with the floorboards, too. A large deck benefits from varied patterns on different levels. Try running the boards perpendicular on the steps to create visual interest. Cut the corners diagonally. Swap traditional vertical railings for sleek horizontal designs. These small design choices prevent the space from feeling repetitive.
“A very large deck has a warmer appearance when broken into levels.”
Understanding Raised Decks
When you move beyond the ground level, you’re dealing with a raised deck. These structures float above grade, supported by posts and beams rather than sitting directly on the soil. This elevation offers distinct advantages. You gain privacy from neighbors, reduce exposure to ground moisture, and create a defined boundary between indoor living space and the yard.
Before you dig, check your local building codes. Height requirements often dictate whether you need a permit, a railing system, or specific structural supports. A raised deck isn’t just a platform; it’s a structural project that demands careful planning to ensure it remains stable and safe over time.
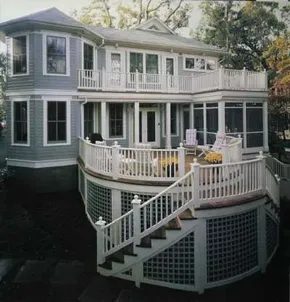

A flat lot makes outdoor living easy. A flush deck or concrete patio sits right on the ground. Most lots, though, are not flat. You need posts. The term “raised” covers a lot of ground, pun intended. It includes any deck that is not directly on the soil.
Sometimes a raised deck floats just a foot above grade. That is enough to clear the back door threshold. Other times, it climbs several feet to match interior room levels. Then it steps down a slope. It can stand alone in the yard. Or it wraps around the house.
Close to the ground? Simple support. Higher up? You need engineering. Stability matters. Bearing loads are real. The substructure has to hold the weight.
Building a Raised Deck on Sloped Terrain
Your site dictates the structure. A nearly level site allows for a simple on-grade deck. But if you have a slope, the deck becomes a raised structure. This system uses posts to elevate the floor.
The height varies. One foot gets you over the back door threshold. Several feet aligns the deck with interior rooms. The design might step down the slope. It can be freestanding or attached to the house.
Low decks need basic supports. High or complex decks need an engineered substructure. You need stability. You need to handle bearing loads. The foundation has to be right.
Choosing the Right Deck Support System
The support system depends on height and complexity. A deck close to the ground requires a relatively simple frame. A deck that sits above the ground demands more.
Engineered substructures handle stability. They manage bearing loads. If you are building high, do not cut corners. The posts and beams need to support the weight of the people and furniture.
For a flat site, a flush deck or patio works. For a sloped site, posts are necessary. The deck can float slightly or rise significantly. It can be a standalone element or attached to the home. The key is matching the structure to the terrain.
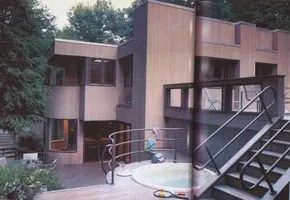

How a Curved Wall Softens Modern Lines
Contemporary design leans hard into drama. You strip away the ornament. No frills, no clutter. Just line and form doing the heavy lifting.
Take this specific build. It is an architect’s own home. The structure relies on strong vertical and horizontal planes. But then you hit the curve. A sweeping wall breaks the rigidity. The midlevel deck follows that same arc. So do the handrails. It is a continuous flow, not a box.
The metal railings pick up on a nautical vibe. Why? There is a pond sitting at the base of the deck. The water influences the whole aesthetic. The open framework of the rails does double duty. It keeps the view clear. It also keeps the space safe.
Why Plexiglass Works for Views and Safety
You want to see the trees. You want the spa to feel open. But you also have kids.
The upper deck wall uses clear plexiglass inserts. This is the trick. You get unobstructed sightlines whether you are sitting, dining, or soaking. The glass keeps the toys and the children contained. It is a barrier you barely notice.
The nautical theme dictated the palette. Driftwood gray on the walls. A darker shade for trim and railings. A waterlike blue-gray on the deck surface.
These colors tie the structure to the landscape. The gray feels like weathered wood. The blue-gray mirrors the pond. It is not just a color choice. It is a connection.
Which Materials Fit This Aesthetic
If you are replicating this look, look at the material choices.
- Metal railings: Open framework. Nautical styling.
- Plexiglass: Clear inserts for safety and transparency.
- Decking: Blue-gray tone.
- Walls: Driftwood gray with darker accents.
The goal is integration. The deck is not an afterthought. It is part of the architectural statement. The curve is not decoration. It is structure.
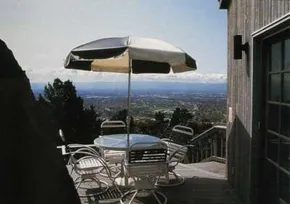

Positioning Your Deck for Maximum Panorama
Open lots change how you build. If you have a sweeping view, the standard boxy deck gets in the way. You want sightlines. Contemporary homes already push this with floor-to-ceiling glass and clean lines. Your deck needs to match that energy.
Placement is everything here. Because decks can be any shape, you can design around the view instead of the other way around. Two main strategies stand out for unobstructed vistas.
Stepped Decks: Looking Down and Beyond
The first option is a series of levels. Think of it like a terraced hillside. You build the first tier right off the house, then step down and away from the structure.
Why does this work?
- Elevated sightlines: People sitting on the upper levels look over the lower ones.
- Visual clarity: You see across the deck surface to the horizon.
- Less obstruction: No bulky furniture or high railings blocking the view from the top tier.
This layout is ideal when the ground slopes away from your home. You get the panoramic effect without needing a massive, single-level platform.
Low-Profile Platforms: Keeping the Horizon Line
If your site is flat or only slightly sloped, a single broad platform is often better. The challenge? Safety without sacrificing the view.
High railings kill the panorama. So you avoid them. Instead, you use low benches and planters.
- Low benches act as a safety barrier for seated users without blocking the line of sight.
- Planters define the edge visually but remain low enough to see over.
This setup maximizes both close-in views of the yard and distant views of the horizon. You get the safety of a railing without the visual clutter.
The goal isn’t just a deck. It’s a viewing platform that doesn’t interrupt the view.
When you’re measuring out the site, walk it. Sit where people will actually sit. Look out. If your shoulders block the view, the deck is too high or the furniture is in the wrong spot. Adjust the plan before you cut a single board.
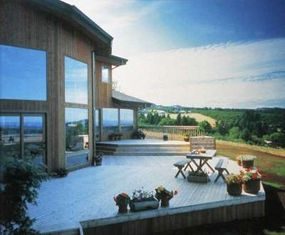

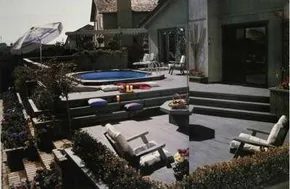
Extending the Living Space with a Two-Tier Deck
Decks have become the go-to solution for homeowners dealing with tight lots and restrictive zoning laws. They beat out traditional lawns and patios on one major point: connection. A deck sits at the same level as your interior rooms, running right up to the door. It turns the outdoors into a seamless extension of the house rather than a separate, disconnected zone. You can build it to match the exact wood, stain, or texture of your home’s exterior, making the transition from inside to outside feel less like a threshold and more like a continuation.
The project in question tackled a specific problem. The backyard sat significantly below the house, was high-maintenance, and offered zero visual or functional connection to the living areas. It was boring. The solution was a two-tiered redwood deck spanning the full width of the lot.
This wasn’t just a platform for standing on. It integrated features the old lawn could only dream of:
- An aboveground swimming pool
- Dedicated zones for dining and conversation
- Built-in planters that don’t require constant upkeep
- A trellis structure for afternoon shade and neighbor privacy
Matching Materials for Indoor-Outdoor Cohesion
Why does material consistency matter? Because disjointed aesthetics make a space feel cluttered. When the deck uses the same finish as the house siding, the visual weight drops. The eye stops fighting the transition.
If you are considering a similar build, look at your home’s existing palette. If the house features warm redwood tones, lean into that. The redwood chosen here wasn’t an afterthought; it was the anchor for the entire outdoor design. It allowed the structure to feel native to the property rather than an addition bolted on later.
Addressing Elevation Changes in the Backyard
High maintenance lawns on sloped or sunken lots are a common headache. Grading soil, watering, and mowing uneven terrain eats up weekends. A tiered deck solves the elevation issue by creating flat, usable platforms at different heights.
The lower tier likely handles the pool and planters, keeping heavy water features away from the main living area floor level. The upper tier acts as the primary outdoor room, connecting directly to the interior. This separation also helps with privacy. The trellis mentioned in the design isn’t just decorative; it blocks sightlines from neighboring properties during peak afternoon hours.
Practical Layout for Small Lots
Space is tight in suburban settings. Every square foot needs to earn its keep.
- Width usage: The deck stretches across the entire lot width. No wasted corner space.
- Zoning: Distinct areas for eating, talking, and swimming prevent the space from feeling chaotic.
- Low-maintenance greenery: Built-in planters mean you aren’t constantly digging in soil. The soil is contained, watered is controlled, and maintenance is minimal.
If you are looking to replicate this, check your local building codes first. Deck height and proximity to property lines can trigger permit requirements. Also, consider the structural load if you plan to add an aboveground pool. The footings will need to be engineered to handle that weight.
Why Redwood?
Redwood is naturally rot-resistant and durable. It holds up well against the moisture from pools and plants. For a DIYer, it is easier to
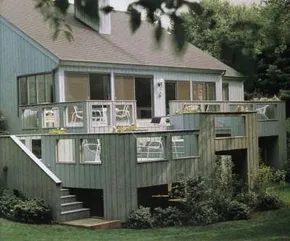

How to upgrade a basic deck to match modern home architecture
Most homes built in the last quarter-century got a deck as standard. It worked. It was ugly. Usually, you got a flat rectangle with basic railing, sticking out the back of the house. Maybe some stairs. Maybe not. If that sounds like your backyard right now, a remodel is the only way to stop it from looking like an afterthought.
Take the project shown here. Before the work started, it fit that plain-Jane box perfectly. The deck had no connection to the lawn. It was an isolated platform. Worse, it clashed with the sharp, contemporary lines of the house itself. The new design fixes that. The updated structure mirrors the crisp styling of the building. It actually connects the living space to the grass.
That shift is the whole point. A deck isn’t just a floor. It’s an architectural element. If your house has clean lines, your deck needs them too. If your house is messy, maybe keep the deck simple. But if you have a modern build and a boxy deck, you have a visual conflict. You can fix it with geometry, materials, and layout.
Why a standard rectangular deck fails on contemporary homes
Think about the lines. Contemporary architecture relies on precision. Sharp angles. Clean sightlines. A standard deck usually ignores all of that. It’s a block. It sits there, disconnected. It doesn’t flow into the landscape. It just… exists.
When you look at the before-and-after, the difference is obvious. The old deck was a dead end. The new one is a destination. The railing doesn’t just go up and down. It follows the logic of the house. The platform shape aligns with the facade. That alignment is what makes it feel intentional.
This is where DIY gets tricky. You can buy pre-cut railing panels. You can screw down a simple frame. But if you want the deck to echo the architecture, you need to measure against the house, not just the lot lines. You need to check the slope of the land. You need to decide where the stairs go so they don’t block the view or the path to the garden.
Which materials match clean, crisp deck styling
You don’t need exotic wood. You need consistency. If the house has white trim, dark metal accents, or concrete elements, the deck should pick up at least one of those cues.
- Composite decking : Low maintenance. Holds color well. Good for crisp lines because it doesn’t warp as much as softwood.
- Cable railing : Transparent. Keeps sightlines open. Lets the lawn show through.
- Concrete pavers : If the deck connects to a patio, matching the paver size and color to the house foundation creates visual continuity.
- Metal posts : Steel or aluminum posts look sharper than wood. They hold a clean profile.
For this specific remodel, the key was removing the visual bulk. The old railing was likely wood, heavy, and opaque. The new setup uses materials that let you see through to the yard. That transparency makes the deck feel lighter. It stops the house from looking like it has a block attached to it.
You also need to think about the transition. How does the deck meet the lawn? A simple drop-off is common. But if you have a slope, you need steps. If you
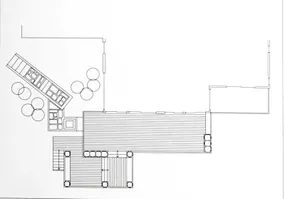

Built-in Benches and Plexiglass Railings
The site slopes. That changes everything about how you move through the space. Instead of a flat, static transition, the design uses three distinct levels to walk you down from the living areas to the yard. It’s a pleasant experience. Your eyes follow the drop. Your feet follow the path.
Along that route, you don’t just get stairs. You get functional furniture. Built-in benches give you a place to sit and watch the garden grow. Planters flank the route, softening the hard edges of the hardscape. It’s not just a walkway. It’s a destination.
Safety matters on a slope. You need a barrier that keeps people from sliding off, but you also need to see the view. A solid wood railing would block the landscape. A chain-link fence would ruin the vibe. The solution here is clear plexiglass inserts in the railing.
Why plexiglass? Two reasons.
- Transparency: You get unobstructed views of the surrounding landscape. The railing disappears visually.
- Safety: It’s a solid barrier. Kids can’t climb through gaps. Pets can’t slip through. It’s sturdy enough to lean on, clear enough to ignore.
If you’re doing this yourself, measure the railing sections carefully. Plexiglass is heavy. You’ll need reinforced brackets or a channel system that can handle the weight and wind load. Don’t cut corners on the fasteners. A cracked plexiglass panel on a slope is a liability, not just an eyesore.
Clear plexiglass inserts in the railing provide safety and allow unobstructed views of the surrounding landscape.
Hi-Tech Touches Add Zest and Color
You’ve handled the structure. The slope, the levels, the benches, the glass. Now, what makes it yours?
This is where the tech comes in. Not in a cold, corporate way. In a way that adds zest and color to the evening hours. Think LED strips tucked under the bench overhangs. Think smart lights that shift hue with the season. Think sensors that dim the path lights when you step away.
These aren’t gimmicks. They’re tools to extend your usable hours outside. A slope can feel isolating at night if it’s dark. Layered lighting breaks that isolation. It highlights the planters, outlines the bench edges, and makes the plexiglass railing glow subtly against the dark sky.
You don’t need a full smart home setup. Start simple.
- Under-bench LEDs: Warm white works best. Avoid harsh blue tones. They clash with the green of the planters.
- Path lighting: Low-voltage fixtures along the edge of each level. Spaced every 4 to 6 feet.
- Railing accents: If your plexiglass allows, consider a subtle backlight. It turns the safety feature into a design element.
Check local codes before wiring anything. Outdoor circuits need GFCI protection. Weatherproofing isn’t optional. IP65 rating minimum. Water gets in everywhere. If you can’t seal it, don’t install it.
The goal isn’t to show off. It’s to make the transition from house to yard feel intentional, safe, and a little bit magical when the sun

Mix Materials for a Modern Deck Railing
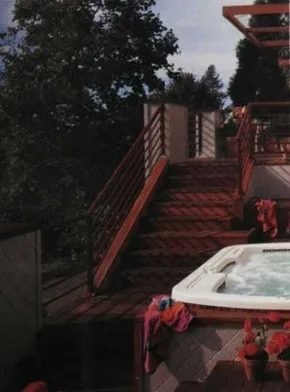
Wood surrounds don’t have to mean wood everywhere. You can shift the mood of your deck by swapping the railing material.
Take a steel tube railing. It brings a hi-tech edge. The look gets contemporary, even if the house itself is clad in traditional timber.
A 1950s home got a zesty facelift using this exact technique.
The deck itself? Redwood. The railing? Steel tubing, painted a bold, exuberant red. The contrast is what makes the space feel updated. You don’t need a full demolition to change the vibe. Just change the frame.

How built-in seating expands a narrow deck footprint
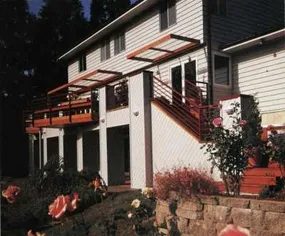
You don’t need a massive slab of wood to get comfortable. This build proves it. By adding two triangular popouts, the design recovers square footage you thought was lost to the house’s narrow profile.
Bulky patio furniture? Gone. The built-in seating does the heavy lifting. It tucks into the corners, giving you a place to sit without eating up the walkways. It’s a spatial trick that works when your yard is tight.
Why French doors beat aluminum windows for deck access
The old setup? Aluminum windows. Closed off. Inefficient.
The new setup installs French doors. They open fully. They connect the deck directly to three main living zones:
1. The living room
2. The dining room
3. The kitchen
This isn’t just about airflow. It’s about flow. You can move food, people, and conversation between the kitchen and the hot tub area without navigating a cramped hallway. The doors act as a pivot point for the whole house.
How stairs and landings organize deck activities
A single flat deck is a mess. Everyone wants to be somewhere else.
This design uses a series of stairs and landings to separate zones.
– One landing handles dining.
– Another serves the hot tub relaxation area.
– The steps provide a clear, easy route straight to the backyard.
It’s zoning without walls. You keep the privacy of the dining group from the bathers, but you don’t build a fence. The vertical change in elevation does the work.
How redwood siding updates an existing house exterior
Material choice matters for cohesion. The lower portion of the deck uses painted redwood siding. It matches the existing house, so the addition doesn’t look like a bolt-on.
The detail is in the pattern. A diagonal layout breaks up the visual weight of the wood. It updates the building’s appearance without stripping away its original character. It’s a subtle refresh. The house looks newer, but it’s still the same house.
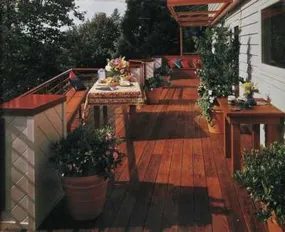

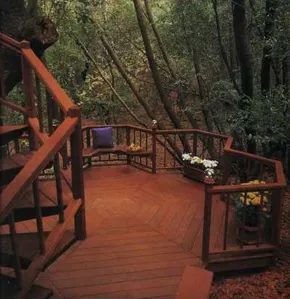

Modular Deck Systems for Tight Spaces
When the yard is smaller than you’d like, or the terrain makes standard framing a nightmare, a modular deck system is often the best bet. You build the sections in your garage or a workshop. Then you haul them to the site and bolt them together. It sounds like cheating, but it’s smart engineering.
You don’t have to prefab the whole structure. Usually, it’s just the floor decking panels. But you can pre-build the stairs, railings, and even built-in seating too. This cuts down on wasted material. It also saves a lot of labor. If you can’t get a truck up to the site, you can carry the pieces by hand. No cranes needed.
A modular deck is composed of sections prebuilt at a shop (or in the garage) and then assembled on-site.
Squeezing Every Inch Out of a Small Deck
If modularity isn’t your style, look at the geometry. Make the deck fit exactly where it goes. No wasted gaps.
- Sandwich it: Place a simple platform between the house siding and the property line fence. If you have 36 inches of clearance, use 36 inches.
- Stack it: Create a series of tightly interconnected levels. Think of it like a topographic map. One level feeds into another. It feels bigger than a single flat surface.
- Revamp the existing path: Got a narrow concrete walkway and some ugly back steps? Tear them out. Replace them with broad landings. Add built-in benches and planters. Now you have a functional outdoor room instead of just a path to the door.
The goal is to make the space work, not just look pretty. If you can’t fit a standard 12×12 deck, don’t force it. Design for the constraint.
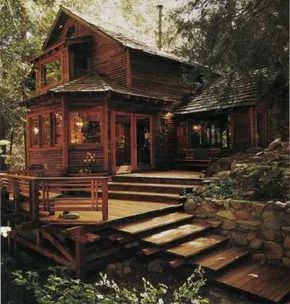

Bi-Level Redwood Decks for Steep, Rocky Mountain Terrain
Mountain vacation homes rarely come with an outdoor living space that actually works. The setting is usually gorgeous, sure. Thick timber, cold nights, wildlife that might be watching you from the tree line. But if the lot is steep, rocky, and confined, putting a standard patio or level deck on the ground is often impossible. That was exactly the problem with this redwood home. It sat in a beautiful spot near a seasonal creek and small waterfalls, but the site itself made traditional decking a nightmare.
The owners needed a way to enjoy the natural sounds and views without tearing up the landscape or fighting the grade. The answer wasn’t a massive platform hovering over the yard. It was a bi-level redwood deck that hugs the ground.
Building on a steep slope requires a different approach to framing. Instead of trying to force a single flat plane across uneven earth, the structure steps down. The upper level sits low to the ground, minimizing the visual impact and the amount of excavation needed. From there, the deck transitions to a lower landing area that brings you closer to the creek. This design preserves the natural look of the site while creating a functional outdoor room.
When dealing with rocky, confined terrain like this, material choice matters. Redwood is a natural fit for mountain cabins for a few reasons. It’s durable enough for outdoor use without heavy chemical treatments that might clash with the rustic aesthetic. It also weathers to a silvery gray that blends into the surrounding landscape rather than standing out as a foreign object.
The key here is how the deck interacts with the grade. A gentle slope allows for a simple step-down transition between levels. You don’t need complex staircases or elaborate railing systems that block the view. The structure steps down a gentle portion of the grade to a landing near the water. This keeps the profile low and unobtrusive.
For a DIYer tackling a similar site, the lesson is clear: don’t fight the land. If your lot is steep and rocky, a multi-level deck that follows the natural contours will be easier to build, cheaper to install, and far more pleasant to use than a massive monolithic platform supported by hundreds of concrete piers. The goal is to extend your living space to the edge of the property, not to dominate it.
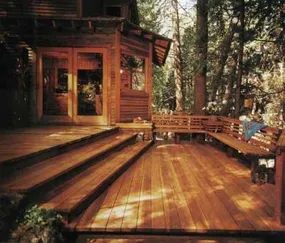

How angled outdoor stairs work between rocks and walls
The connecting stairs in this design don’t just sit on the ground. They angle through the space between existing boulders and run parallel to a stone wall. As they descend, the width narrows. It’s a deliberate move. The structure appears to hover, especially as it meets the earth.
This isn’t just about aesthetics. The geometry matters.
Why open railings matter for interior sightlines
The integrated railing and built-in benches follow a light, open style. No solid panels. No visual clutter. The goal was simple: don’t block what you see from inside the house.
When you’re sitting in the living room, you want the view to extend past the glass. A heavy, opaque railing stops that flow. A slim, open design lets the landscape continue uninterrupted.
- Built-in benches double as seating and structural elements.
- Integrated railings provide safety without visual weight.
- Narrowing width guides the eye and reduces material cost.
If you’re planning a similar feature, consider how your interior rooms face the outdoor space. A railing that blocks the view from the kitchen feels like a wasted opportunity. Keep it airy.
Where to place narrow descent stairs
The key is the angle. The stairs aren’t straight down. They slant to fit the natural contours of the site. Existing rocks and the stone wall act as anchors. You’re not moving earth or demolishing features. You’re working with what’s already there.
This approach saves money on excavation. It also preserves the character of the site. The stairs seem to emerge from the landscape rather than being imposed on it.
Think about your own property. Do you have a slope? A cluster of large rocks? A stone boundary wall? If yes, you might be able to thread a narrow staircase through that space. The trick is measuring the usable width at every level. If it gets too tight, the descent becomes awkward. If it’s just right, it feels intentional.
Which materials keep outdoor stairs light but durable
Lightness in design doesn’t mean fragile. The materials still need to hold up to weather, foot traffic, and time.
- Concrete for the stair treads, possibly with a textured finish for grip.
- Metal railings (steel or aluminum) for the integrated handrails, slim profiles to maintain openness.
- Stone or concrete for the built-in benches, matching the tone of the existing wall or rocks.
If you’re DIYing this, consider precast concrete treads if you don’t have the formwork skills. They come in varying widths, which makes it easier to match the narrowing profile. For the railing, powder-coated steel is a solid choice. It resists rust and comes in finishes that can blend into the stone surroundings.
Safety comes first. Even an open railing needs to meet local building codes for height and post spacing. A 36-inch height is standard in many areas. Posts should be spaced so a 4-inch sphere can’t pass through. Don’t skip the code check. It’s not just about aesthetics.
How to match outdoor stairs to existing stone walls
The stairs run along the stone wall, which means they share a visual language. The narrowing width echoes the irregular edges of the rocks. The light railing doesn’t fight the

Why Multiple Deck Access Points Beat Single-Entry Designs
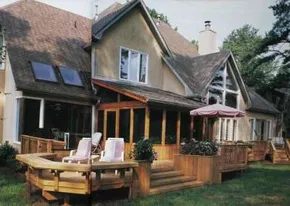
A deck works best when you don’t have to squeeze through one narrow door to get outside. Think about the hallway shortcut. You walk past the kitchen, cut through the family room, and finally reach the back door. Doing that daily wears down your floors and disrupts the flow of your home. Adding a second or third access point fixes that. It makes the deck feel like a true extension of your living space rather than a separate island you have to fight your way to.
This isn’t just about convenience. It’s about zoning. When two or three rooms open onto the deck, you can create distinct areas for different activities without cluttering one big space.
Zoning Your Outdoor Space by Room
Group your furniture to match the interior room it connects to.
- Living Room Access: Place comfortable seating and conversation areas here. This is your outdoor lounge.
- Kitchen Access: Position the barbecue and dining table here. Keep food prep close to where you eat.
- Dining Room Access: Use this point for formal dining sets or a smaller bistro table.
If your deck has multiple levels, assign specific functions to each tier. A lower level accessed from the garage might house a grill station. An upper level opened by the family room could feature a hammock or reading nook. Each zone serves a clear purpose, which keeps the space organized and usable.
Practical Benefits of Multi-Point Deck Design
More doors mean less wear on your interior flooring. You stop routing foot traffic through the family room just to get to the backyard. The deck becomes a functional part of your daily routine.
- Reduced Hallway Traffic: Direct access from key rooms shortens the path outside.
- Flexible Layouts: You can rearrange furniture or appliances as your needs change.
- Improved Flow: Guests can move between indoor and outdoor spaces without bottlenecks.
Consider which rooms in your home benefit most from direct outdoor access. The kitchen is almost always the best candidate. The living room is a close second. If you have a home office or a guest room, adding a window or door to the deck from those spaces can transform how you use the entire property.

Greek and Roman Roots Show Up on the Back Porch
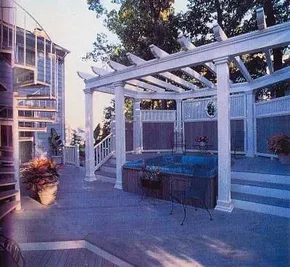
You don’t need a history degree to pull off a classic look on your deck, but knowing where the style came from helps you execute it. American architecture borrowed heavily from Greece and Rome starting in the 1700s. Southern Colonial mansions used colonnades, giving you shade without sealing in the heat. Georgian homes leaned into grand entrances, often featuring a pedimented roof held up by sturdy columns. Then there were the “villas,” like Thomas Jefferson’s Monticello, which brought outdoor walkways and pergolas into the mix.
By the mid-1800s, Greek Revival was everywhere. Carpentry shops across the country had the patterns memorized. Today, architects still use these classical principles. Some go all in. Others just hint at it. Your deck can handle either approach. The key is scale. If the proportions don’t match the size of the house, it looks like a costume. Get the balance right, and the deck feels like part of the structure, not an afterthought. Symmetry in the floor shape and detailed overhead shelters are the easiest places to inject that classical vibe.
Craftsman Style Meets Modern Decking
The Craftsman theme feels at home on decks, especially if you want something that feels grounded and sturdy rather than ornate.

The roots of honest woodwork
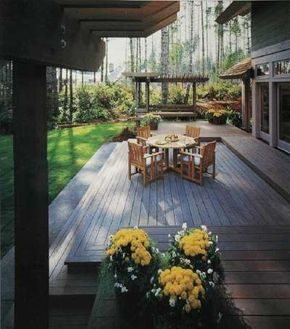
Craftsman architecture didn’t just appear; it erupted in the early 1900s as a direct rejection of ornate, mass-produced trends. It was a movement built on simplicity, beauty, and what the architects called “honesty.” This meant showing the material. No hiding the joints. No fake moldings covering up poor joinery.
The style found its strongest foothold in the American West. You saw it in everything from sprawling estates to the humble, iconic bungalow that still dominates suburban backyards today. The design language was distinct. It used wood expressively. Timbers were exposed. They were shaped, fitted, and joined in bold, rhythmic lines that celebrated the joinery itself rather than concealing it.
How the house connected to the land
This wasn’t just about the walls. Many Craftsman designs treated the property as a single unit. The house didn’t sit in a yard; the yard was a planned extension of the home.
Gardens and outdoor living areas were integral parts of the blueprint. This holistic approach is standard now, but back then, it was rare. Other styles kept the interior and exterior separate. Craftsman blurred that line. If you are looking to replicate that feel during a renovation, consider how your deck, patio, or garden path flows directly from your living space. It’s a detail that makes the whole structure feel intentional, not just assembled.
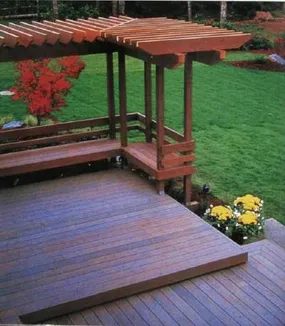

That Japanese influence wasn’t just aesthetic. It was structural. Artisans and architects studied the precision in Japanese joinery and material use. They saw how light wood frames could handle weight without heavy fasteners. It clicked.
The result? A hybrid style. Not pure Shingle, not pure Japanese. Something new. Homes built in the last few decades often sit in this space. Comfortable. Functional. Visually quiet.
Regional Influences and Materials
Where you build changes what you build. Geography dictates material choice. It dictates how the house breathes.
In coastal areas, shingles are non-negotiable. Cedar, cypress, or redwood. These woods rot slower when exposed to salt air. They also shed water fast. That matters. A bad roof pitch in a high-rain zone leads to leaks. Leaks lead to rot. Rot kills the house.
Inland, things shift. Brick becomes common. Stone becomes common. Why? Wind. Dry climates. The mass of a brick wall stabilizes temperature. It absorbs heat in the day. It releases it at night. Passive cooling. No HVAC needed for half the year.
Think about the tools. If you’re working with stone, you need chisels and hammers, not a circular saw. If you’re laying brick, you need a trowel, a level, and plenty of mortar. The material dictates the workflow.
Wood framing is different. You need a saw, a drill, a level. Maybe a nail gun if you’re going fast. Safety glasses. Always. Wood chips fly. They don’t care about your corneas.
The hybrid style often mixes these. A brick foundation. A wood frame. Shingled gables. It works because each material does what it does best. Brick handles the ground contact. Wood handles the structure. Shingles handle the weather.
Don’t force materials. Don’t put stucco where it doesn’t belong. Don’t use softwood where it needs to take a load. Match the material to the job. The house will last longer. It will look better. It will feel right.
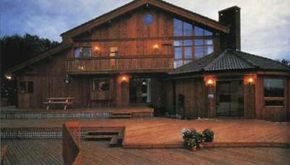

Why Pacific Northwest Decking Reflects Local Vernacular Architecture
Building a deck isn’t just about adding square footage. It is about continuing the logic of the house. That logic is Pacific Northwest regional architecture. This style did not emerge from a single architect’s dream. It grew from the land. The climate demanded specific solutions. The materials were whatever the forest provided.
Vernacular architecture is the term for this. It means building with what is local. In New England, that meant clapboard siding and small windows to trap heat. In the Southwest, it meant thick adobe walls to block the sun. The Pacific Northwest did the same thing. The region’s diverse history created a mix of shapes and moods. But the core function remains the same. Protect the interior from weather. Use native resources.
When you plan your own deck, look at your house’s original intent. Is it a craftsman style? A farmhouse? The deck should feel like an extension, not an afterthought.
How Local Climate Shapes Deck Material Choices
You want a deck that lasts. In the PNW, rain is the enemy. Constant moisture attacks wood.
- Cedar: Native to the region. Naturally rot-resistant. Heavy, but beautiful.
- Composite: Often contains recycled plastic. Low maintenance.
- Pressure-treated pine: Cheap. Durable if maintained.
Do not pick a material just because it looks good in a catalog. Pick it because it survives your specific weather. A deck that fits the site will age better than one that fights the environment.
Which Design Elements Match Vernacular Styles
Vernacular homes often have low profiles. They hug the ground. Your deck should do the same.
- Low railings: Keep sightlines open.
- Simple lines: Avoid ornate balusters unless the house has them.
- Overhangs: Extend the roof line. This protects the deck structure from direct rain.
Why does this matter? Because a deck that mimics the house’s weather-resistance strategies will require less maintenance. You are not just building a platform. You are extending the shelter.
Where to Start with Your DIY Plan
Start with the existing foundation. Where does the house sit on the land? Is the grade sloped? The Pacific Northwest terrain is rarely flat. Your deck needs to adapt.
Use a level. Check the fall. If the ground slopes away from the house, you can build down. If it slopes toward the house, you need a taller deck with steps. This is not a design choice. It is a physical necessity.
“The regional styles reflect a composite of shapes, materials, and moods.”
Your deck should be part of that composite. Not a separate object. A connected element.
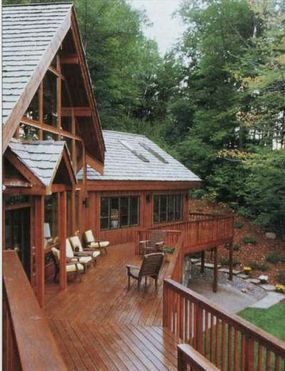

How Western Red Cedar Handles Year-Round Weather and Light
That is exactly why so many of these builds lean into the outdoors. You want a space that feels usable when the sun is actually up. Large decks handle those warm, clear days well, letting you sit outside without worrying about the thermometer. Then there is the rest of the year.
When the sky turns gray and the light dies down, those same spaces can feel oppressive inside. Big expanses of glass fix that. They pull the view and whatever daylight remains straight into the living areas. You stop feeling boxed in during the overcast stretches.
The material choice here is specific. You are looking at local western red cedar.
This is not just a siding decision. It is a durability one. Western red cedar has natural oils that help it resist rot and insects without needing heavy chemical treatments. That matters when you are dealing with rain, snow, and humidity year-round.
The finish is where people often get it wrong. They want to seal it until it looks like plastic. Or they use a stain that hides the grain. That defeats the purpose. The goal here is to let the wood look like wood.
- Sand it smooth. Remove the rough mill marks.
- Apply a penetrating oil or clear sealer. This protects the surface without adding a thick film.
- Check for UV inhibitors. Cedar turns silver and gray if the ultraviolet light breaks down the surface fibers. A clear finish with UV protection slows that down.
You will see the natural knots and grain variations. That is the point. The texture changes as the wood ages. Some homeowners like that. Others prefer a more uniform look. But if you are using this species, you are accepting that it is a living material. It moves with the seasons. It dries out. It swells.
The combination of the big glass and the cedar deck creates a specific type of comfort. You are not just hiding from the weather. You are watching it. The light shifts on the interior walls. The sound of rain on the deck becomes part of the room’s atmosphere.
Make sure your glass is low-emissivity if you are in a colder climate. You do not want the heat escaping right back out through the panes. The cedar handles the exterior exposure. The glass manages the light and temperature balance inside.


Matching Deck Style to Tudor Architecture
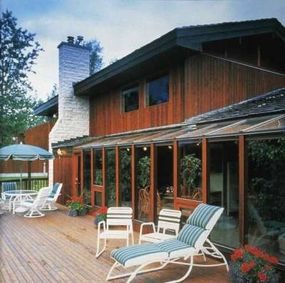
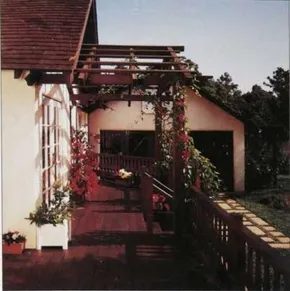
Tudor homes are distinct. They feature stucco walls, exposed half-timbers, and small leaded windows. You won’t find a modern minimalist deck that looks right on this kind of house. The structure needs to echo the home’s history.
Look at the rooflines. If your house has steep gables, your deck roof should too. A simple flat canopy will clash. The timber-frame construction of the deck acts as a nod to the characteristic half-timbers of the Elizabethan style. It’s not about copying the house exactly, but respecting its vocabulary.
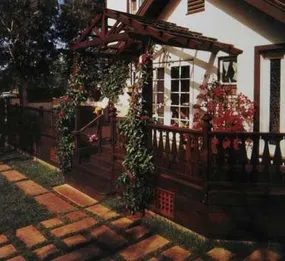
The gabled structure above the French doors echoes the shape of the roof lines, its timber-frame construction also a reminder of the Tudor’s characteristic half-timbers.
Why Redwood Works for Period Homes
Redwood is a common choice for these additions. It has a natural warmth that pairs well with stucco and stone. Unlike pressure-treated pine, which can look cheap and splinter quickly, redwood offers a richer tone.
If you are building this yourself, check your local building codes first. Attaching a deck to a 100-year-old home requires care. You don’t want to damage the historic masonry. Use lag screws or through-bolts designed for masonry, not drywall anchors. Make sure the ledger board is properly flashed to keep water out of the wall cavity.
Key materials for a Tudor-style deck addition:
– Redwood or cedar for the decking and framing
– Exposed timber beams for the overhead structure
– Galvanized or stainless steel fasteners for exterior exposure
Practical Steps for a Custom Build
Start by measuring the wall surface where the deck will attach. Check for rot or soft spots. Tudor homes often have hidden moisture issues. If the wall is compromised, repair it before you mount the deck.
Next, frame the overhead structure. This is the part that sells the look. You are essentially building a mini-roof. The rafters should be exposed, not hidden under drywall. This creates the “half-timber” effect.
Finally, install the deck surface. Keep the overhang consistent with the house’s eaves. A deck that sticks out too far looks like an afterthought. A deck that is too close feels cramped. Aim for a proportion that mirrors the home’s existing rhythm.
Does your deck need to match the house exactly? No. But it needs to feel like it belongs. If it feels bolted on, it will always look wrong.
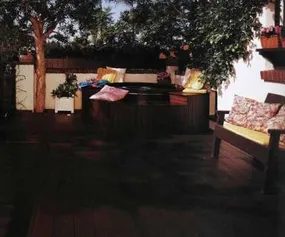

The redwood siding does more than just cover the frame. It wraps the structure tightly, creating a visual anchor that pulls the house down into the landscape. Before this addition, the side yard was dead space. Now it has presence. The deck feels planted, not tacked on.
Matching Deck Tones to House Trim
Dark stains are the glue here. They echo the house trim and the shingled upper walls. That repetition creates a traditional, cohesive look. You are not painting the deck to match the fence or the garden. You are matching it to the architecture.
Think about how light hits these surfaces. Dark wood absorbs it differently than pale cedar or pressure-treated pine. It makes the wood grain pop without shouting. It looks expensive. It looks old-growth. That is the vibe you are chasing.
If you are doing this yourself, check your stain compatibility first. Redwood is dense. It holds stain differently than softer species. A gel-based stain usually penetrates better on redwood than a water-based one, which can wash out faster. Test on a scrap piece in the shade. What looks rich in the sun might look muddy in the morning.
Why Sideyard Integration Matters
Ignored spaces become functional rooms when you add structure. A deck on the side extends your living area without touching the front or back footprint. It’s a low-impact way to gain square footage.
But integration is key. If the deck looks like a floating platform, it fails. The siding wraps the support posts and skids, hiding the mechanical parts. It turns a platform into a piece of furniture. The house and the deck read as one object.
Use exterior-grade fasteners. Stainless steel or hot-dipped galvanized. Redwood has natural tannins. Cheap metal will rust and bleed. The stain might hide it for a year. Then you have orange streaks running down the beautiful wood. Don’t risk it.
The shingled upper walls set the precedent for texture. The redwood siding continues that textural story. It’s not a clean break. It’s a conversation between materials. That is what makes the design feel intentional rather than improvised.


Old-Style Porches for New Homes
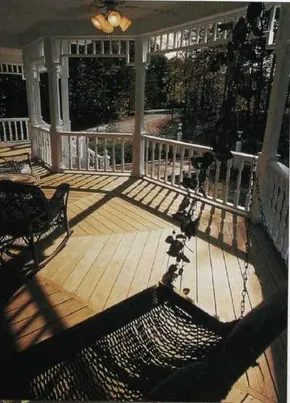
Decks get the credit. Porches get the credit for feeling like part of the house, not a bolt-on addition. You build a porch, and it usually shares the same foundation and roof system as the main structure. That means it handles site conditions the same way your living room does. The floor sits right at the interior level. No climbing stairs to get to your front door. Just a threshold.
You might expect porches to only belong on Victorian shingles or old farmhouses. They do show up there. But modern plans are adding them, too. Families want that transition space. A place to hang out that isn’t quite inside, but isn’t quite outside either. It expands your living area without building another room.
Bringing Privacy to a Deck
You want to be outside, but you don’t want your neighbor watching you eat dinner. Decks are open. Porches are enclosed by walls. If you are building a deck and privacy is a concern, you have to work harder to screen it off. Porches do this for you. The house walls wrap around. You get shelter. You get shade. You get a sense of being tucked in.
Think about the layout. A porch edges along the house. It stays on one continuous level. A deck might have a drop-off. A porch usually doesn’t. It flows. You step off the porch into the yard, or up a few steps if you raised it. But the porch itself is flat. It’s a stable platform.
If you are planning this, look at the foundation. Since it’s attached, you need to make sure the footing is right. You are not just attaching a floating structure. You are extending the home. The roofline has to continue. The weatherproofing has to be tight. If water gets in there, you have a problem inside your house.
This is why porches feel different. They are structural. They are permanent. They change how the house sits on the lot. You are not adding a platform. You are adding a room that happens to be open to the sky.
Check your local codes. Attached structures often have stricter requirements than free-standing decks. The connection to the main frame matters. The drainage matters. The wind load matters. Get a professional to look at the engineering if you are not sure. It is cheaper to fix the plan than the foundation.
You can make a porch work for a contemporary style. Keep the lines clean. Use simple posts. Maybe skip the ornate railings. Go with a minimal look. But keep the function. That transition space is valuable. It softens the edge between your living room and your lawn. It gives you a place to sit in the morning before the house wakes up.

Vertical Privacy Screens and Wind Breaks for Your Deck
You need a barrier. Sometimes it’s just the neighbor’s lawn chair staring right into your living space. Other times, it’s the wind stripping the heat off your skin before you can finish a drink. A deck privacy screen solves both problems without looking like a prison wall.
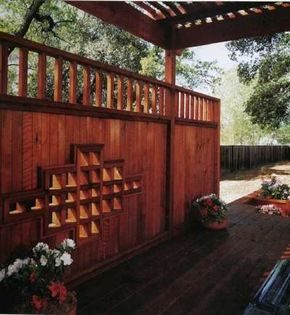
Solid panels block sightlines completely. That’s good for ultimate seclusion. But you don’t always need total blackout. A slatted fence or an open-lattice structure lets light and air move through while still breaking up the view. If you pair these vertical elements with an overhead pergola or roof, you stop feeling like you’re on an open patio. You start feeling like you’re inside a room, just outside.
The trellis is the budget-friendly option here. On its own, a simple wooden lattice offers little privacy. Add climbing vines or plant dense shrubs behind it, and it transforms. Suddenly it’s as effective as a solid cedar fence, but with a softer look and better air flow. This is where material choice matters. Pressure-treated pine is fine for the structural posts, but for the visible face, you might want cedar or redwood to resist rot and hold stains better.
Why Vertical Screens Matter in Windy or Sunny Spots
Horizontal privacy is nice. Vertical is practical. When the sun bakes your deck from the side, or when gusts kick up leaves into your pool, a vertical screen becomes essential.
Think about the angle of the sun. If your deck faces west, the afternoon heat hits directly. A screen on that side cuts the glare. If you have a spa, debris control is huge. Leaves, twigs, and dust don’t just land on the deck. They blow into the water. A screen acts as a windbreak. It slows the air down, letting particles settle before they reach the pool surface. Maintenance gets easier. The water stays cleaner. You spend less time skimming the spa.
This isn’t just about looks. It’s about making the space usable. A windy deck is hard to sit on. A sunny, hot deck is uncomfortable. The screen creates a microclimate. It’s cooler. It’s calmer.
Building Your Screen: Materials and Safety
If you’re doing this yourself, start with the posts. These carry the weight. Use 4×4 or 6×6 timber, set in concrete for stability. Make sure they’re plumb before the concrete sets. Use a level.
For the screen itself, you have options:
- Solid wood boards: Maximum privacy. Use 5/4-inch rough-sawn boards for a rustic look, or 1×6 tongue-and-groove for a tighter fit.
- Lattice panels: 6×6 or 8×8 lattice squares are standard. Attach them to the posts with screws and furring strips.
- Wrought iron or aluminum: Durable, low maintenance, but less wind-resistant. They can act like sails in a storm. If you go metal, ensure the frame is rigid enough to handle wind loads.
Safety first. When cutting wood, use a table saw or miter saw. Wear eye protection and hearing protection. If you’re climbing ladders to install lattice, have someone steady the base. Never work alone at height.
Check your local building codes. Some municipalities
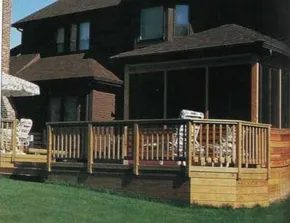

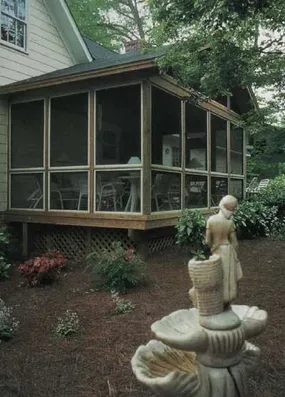
Why a Screened Enclosure Beats a Regular Deck in Summer
Nothing kills a good mood faster than bugs. Rain cancels the grill, yes. But insects show up whether you have clouds or clear skies. A screened enclosure fixes that. You keep the breeze. You keep the view. You keep the sound of the outdoors. You just lose the mosquitoes.
It turns a standard patio into a functional room. Kids who are house-bound on a wet afternoon have somewhere to actually play. Hot summer nights become bearable when you can camp out in the screened space without getting stung. It is a low-effort upgrade that solves a high-annoyance problem.
The History of the Screened Porch
Older homes, especially in the South and other warm zones, had these built in. They were standard features. Then the lawn and open deck took over as the main outdoor living spot. The porch got sacrificed. People converted the space into an interior room instead. That trend shifted the value away from the outdoor screen.
Today, bringing the screen back makes sense. If you have a porch, you do not need to build from scratch. You just need to close it in.
Where to Place Your Screened Space
Location matters. The best spots are:
- The side or rear of the house
- Near the kitchen
- A section of the deck that sits close to the main living area
This placement creates a private outdoor room. You can dine there. You can entertain without feeling exposed. It is steps away from the great outdoors, but safer. If you are using it for dining, proximity to the kitchen reduces the trips back inside. If you are using it for a playroom, being near the house lets you keep an eye on the kids.
Turning an Existing Porch into a Screened Room
You do not need a new structure. Take an existing porch. Add the frame. Add the screen. Done.
The frame usually consists of pressure-treated lumber or metal posts. You secure them to the existing porch structure. The screen itself is typically aluminum or fiberglass mesh. Fiberglass resists rust better in humid climates. Aluminum is more durable against tearing.
Install the frame first. Then stretch the screen. Use a spline to hold the mesh in the frame groove. Trim the excess. Check for gaps. Even a small gap lets bugs in. Seal the edges with exterior-grade caulk if you are worried about rain intrusion or wind lifting the screen.
Safety and Maintenance Notes
Keep the mesh intact. A torn screen is useless. Walk around the enclosure regularly. Look for holes. Patch small tears with screen patch tape. Replace the entire panel if it is severely damaged.
Check the frame for rot. If you used wood, inspect the bottom rails where they touch the ground or the porch floor. Replace any soft spots.
This is not a full room. It does not have climate control. But it does have protection. That is enough for most homeowners who just want to eat outside without swatting mosquitoes.


How to Build a Spa Deck Surround That Actually Works
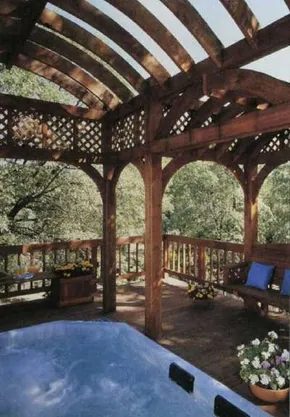
You don’t need a massive backyard to fit in a hot soak. That’s the beauty of these compact units. They squeeze into tight corners, narrow sideyards, spots you’d normally ignore. A deck extension is easy enough to handle.
Most people picture a spa sitting flush with the wood. You can do that. Or you can raise it up, hot-tub style, so it pops out from the surface. Which look do you prefer?
Here’s the thing most DIYers get wrong. The wood planks aren’t holding the weight. That’s a dangerous assumption. The spa isn’t a structural load. It sits on the ground, or on the substructure beneath the deck. The frame supports the water; the deck just frames it.
Because the deck isn’t carrying the weight, you have total freedom with the layout.
- Create a dramatic floor pattern radiating from the unit.
- Echo the shape of the spa in the decking.
- Use contrasting wood tones to accentuate the soaking area.
The location matters more than the wood. Find a quiet spot. Shield it from wind. Keep it close enough to the house to be convenient, but far enough from the neighbor’s fence to preserve privacy.
Why the Spa Deck Substructure Matters More Than the Surface
Stop looking at the top of the deck and looking at what’s underneath. If you’re cutting into the existing substructure to make space for the spa, you’re changing the load-bearing reality. Check your plans.
If the spa is raised, you need a solid platform. Concrete pavers, a prepared ground pad, or a reinforced section of the deck joists. The surround is decorative. The base is functional.
- Tools needed: Circular saw, level, tape measure, drill/driver, impact driver for deck screws.
- Materials: Pressure-treated lumber or cedar, deck screws, joist hangers, possibly a concrete pad or gravel base.
- Safety: Always check local building codes. Some jurisdictions require a permit for any deck extension, even if it’s “just” a surround.
The spa will sit there for years. The wood around it will weather. Plan for drainage. Water shouldn’t pool against the deck frame. A slight slope in the surrounding deck, or a proper gap, prevents rot.
You’ve got the space. You’ve got the idea. Now you just have to build the frame around it.

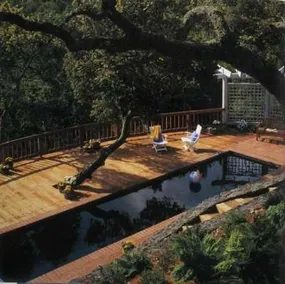
Wood Decking for Pool Surrounds: Why It Works Best
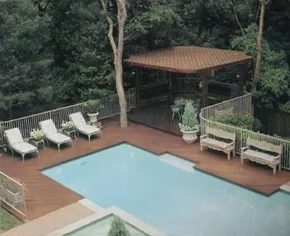
Wood is the default choice for pool decks, and not just because it looks good. It bends. It adapts. Tile and brick are rigid; they want straight lines and flat ground. Wood works with what you’ve got.
If your yard slopes, or the pool sits in a dip, wood decking is often the only practical way to connect the water to the rest of the lawn. It integrates easily with the stone or brick pavers you might use for paths, but it holds the structure together when the terrain gets weird.
Sizing Your Pool Deck: The Rule of Thumb
A common mistake: building the deck exactly as big as the pool. Don’t do that.
The surround needs to be at least equal to the pool’s footprint, ideally larger. You need room for more than just feet. Think about where the towels go. Where the coffee table sits. Where people sit when they’re not in the water.
Aim for a ratio that gives you breathing room. If the pool is 10×20, your deck area should exceed that 200 square feet. Otherwise, it feels like a trap.
Breaking Up Large Deck Areas
Big, flat decks feel cold. They feel like a parking lot for your feet.
If you’re covering a large expanse, break it into levels. Treat the space like separate outdoor rooms.
- Step down from the main pool edge to a lower lounge area.
- Change the board direction. Run the boards perpendicular to the pool edge, or at a 45-degree angle. This breaks up the visual mass.
- Add a shady spot. A pergola or a large umbrella spot is not optional. It’s essential for anyone who plans to actually use the pool during July.
Tight Spaces: Making a Small Deck Feel Bigger
When you’re squeezed into a corner or between a fence and a house, the strategy flips.
You want the space to feel larger than it is.
Built-in benches are the trick here. They take up almost no floor space but give you places to sit. They also stretch out your legs in the sun without needing a chair. A tight deck with built-in seating feels more open than a tight deck filled with movable chairs.
Material and Safety Notes for DIY Builders
If you’re building this yourself, know what you’re working with.
- Wood choice: Use pressure-treated cedar or composite. Standard pine rots fast when it gets wet.
- Fasteners: Only use 316 stainless steel or hot-dip galvanized screws. Pool chemicals will eat cheap metal in six months.
- Grip: Your deck surface must be slip-resistant. Textured boards or anti-slip paint are non-negotiable. A slick deck near a pool is a lawsuit waiting to happen.
- Drainage: Make sure the deck slopes away from the pool edge, even if it’s just 1/8 inch per foot. Water pooling on the deck leads to rot and algae.
Where to Place the Deck for Maximum Utility
The pool is the anchor, but the deck is the room.
Position the deck so that at least 50% of the surface is in shade during the afternoon.

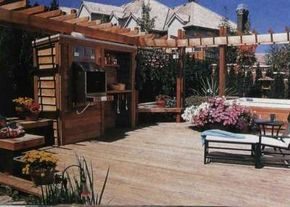

Positioning Your Outdoor Cooking Station for Optimal Use
Distance matters more than most builders realize. Keep the grill close enough to the house to avoid hauling heavy plates across a large yard, but far enough that grease smoke never finds its way into your living room vents or open windows.
You also need clearance above. Overhanging branches are a hazard. The heat will scorch the leaves, and any stray embers could ignite them. Trim back limbs before you set the concrete or lay the pavers.
Choosing Between Charcoal, Gas, and Masonry
Simple kettle grills running on charcoal briquettes remain a durable, low-cost option. If you want a permanent fixture, built-in masonry designs offer heat retention and a solid surface for prep work.
Gas-fired units have surged in popularity. They light faster, clean easier, and allow for more precise temperature control. Which one you pick depends on how often you cook and how much maintenance you want to handle.
A well-placed cooking center isn’t just about the grill; it’s about the workflow around it.
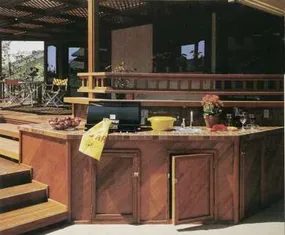
Adding Counters, Storage, and a Sink
A bare grill is a liability for frequent entertainers. Add a concrete or composite countertop next to the unit. This gives you a place to chop, mix, and plate food without running inside.
Consider these additions if your deck plan allows:
- Under-counter shelving for charcoal, lighter fluid, and cleaning supplies
- A small utility sink for washing produce and rinsing tools
- Covered storage to protect utensils from rain
Even if a full outdoor kitchen is too expensive, dedicate one cabinet or shelf specifically for grilling essentials. Keeping tongs, brushes, and thermometers in one dry spot saves time every single time you fire up the coals.
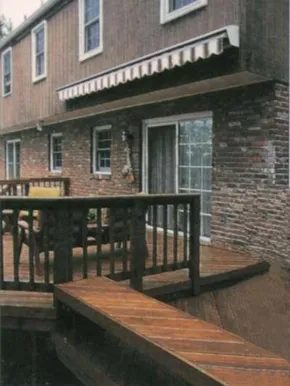

How to stop your deck from turning into a solar oven
Your south or west-facing deck might feel great in the morning. By 2 p.m. in July? It is a furnace. If the structure sits close to the house, that trapped heat radiates inward, warming up your living room whether you want it or not. Unless you have massive oak trees overhead or a deep roof overhang, you need a plan.
You are not looking for a solid roof. That kills the vibe. You want shade coverings that moderate the sun’s intensity without blocking the breeze or the view. The goal is relief, not a basement.
Which materials work for overhead deck screens?
Most DIYers stick with wood. Boards, slats, and latticework are standard for a reason. They age well, match existing trim, and are easy to cut with a circular saw or miter saw.
But wood is not the only option. Consider:
- Bamboo or reeds: Cheaper, lightweight, and give a tropical or rustic feel. They rot faster than wood, so treat them for moisture.
- Canvas awnings: Retractable options work well if you want the sun in the morning and shade in the afternoon.
- Translucent plastic: Good for blocking rain and sun simultaneously. It is less durable than fabric but handles wind better if secured tightly.
Match the scale. A delicate bamboo screen on a massive concrete deck looks like a sticker. A heavy timber lattice on a small balcony feels oppressive. Check the proportions before you buy materials.
Why overhead shelters double as privacy screens
This is the part people miss. If your deck sits under a second-floor window or next to a neighbor’s gazebo, you are on display.
A solid or densely spaced overhead screen solves two problems at once. You stop the sun, and you stop the neighbors.
- Closely spaced boards: Create a solid visual barrier.
- Vine-covered latticework: As the plants grow, the screen becomes thicker. Within a year, you have a living wall that filters light and blocks sightlines.
A deck with dense overhead coverage and vertical vines feels less like an outdoor platform and more like an enclosed room. You lose some openness, but you gain comfort and seclusion.
How to balance light and privacy without ruining the view
Do not build a ceiling. Build a filter.
If you use wood slats, space them evenly. 4-inch or 6-inch gaps usually let enough air and light through to keep the space feeling open. If you need more privacy, add a secondary layer, like a climbing plant or a lower privacy fence, rather than solidifying the top entirely.
Check your local building codes before you start. Some jurisdictions require permits for attached structures or have height restrictions. A $20 permit fee is cheaper than having a contractor tear out your custom lattice because it violated a setback rule.
Safety note: Overhead structures carry weight. Snow load, rain, and even wind pressure add up. If you are attaching to the house, make sure your fasteners go into studs, not just siding. Use structural screws or lag bolts, not drywall anchors. If the deck is freestanding, the frame needs to be anchored to the ground or ballasted heavily.


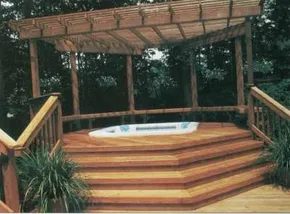

Turning a Flat Deck Into a Focal Point
You have a dead zone on the deck. Maybe it’s the corner near the hot tub, or the spot where you want to set up a conversation pit. It looks flat. Boring. A pergola fixes this. It isn’t just a fancy gate. It’s a roof structure without walls. Rafters and crossbeams pop up from the decking, adding mass and height where there was none.
This is the main game. You are adding visual weight.
Most people install these for pure aesthetics. They want the architecture to look expensive. But you can make it functional. Tweak the open roof. Add a climbing vine. Suddenly, you have a shelter. Not a house. A dramatic overhead cover.
A pergola can become a dramatic overhead shelter with minor changes to the open roof system.
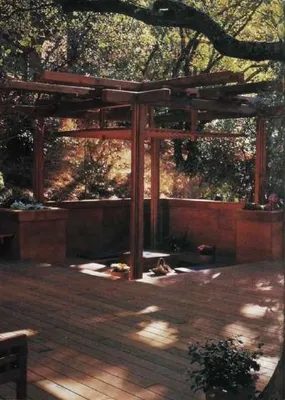
Using Vertical Posts to Define Space
You don’t have to build one big square box. Think linear.
Take a series of separate vertical posts. Space them out. Tie them together at the top with a band of horizontal boards. You just created a tunnel.
Why do this?
- Unify scattered areas. Your deck is large. This structure makes it feel connected.
- Delineate a walkway. You know where to walk.
- Create a roofed passageway. It feels like you are moving from one room to another, even if it’s just grass.
Lace it with greenery overhead now. It stops looking like lumber. It starts looking like an arbor. The vertical rhythm matters here. If the posts are too close, it feels like a fence. Too far, and it feels like random poles. Get the spacing right, and the whole deck feels intentional.



Why Victorian Gazebos Still Work in Modern Yards
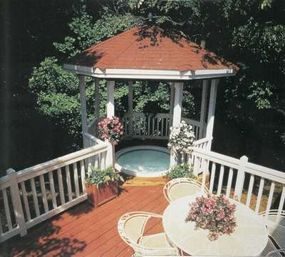
Forget the minimalist pergola. The real draw here is nostalgia. In the Victorian era, the gazebo was the hottest deck idea around. They built them on knolls, far from the main house, specifically to catch the best views. The styling? Over the top. Intricate fretwork, heavy embellishment.
Modern builds stripped that back. You don’t need to replicate the ornate Victorian look to get the same result. Most contemporary structures keep the traditional octagonal shape and the turreted roof. The detailing is cleaner, but the vibe remains. It’s an open-air retreat.
How to Use a Gazebo Beyond Seating
Think of it as a functional zone, not just a pretty box.
- Children’s play space: Safe, enclosed, shaded.
- Sunday brunch spot: A dedicated dining area with a view.
- Poolside changing room: If you partially enclose it, it works as a private nook near the water.
- Studio or storage: Keep garden tools out of the garage. Give them a home.
It complements the house and the garden simultaneously. You get old-fashioned pleasure without needing to install a Victorian-era kit of parts.


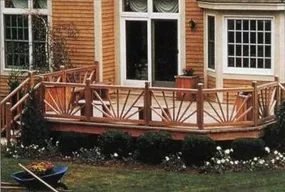
Elevating Deck Railings Beyond Standard Safety Code
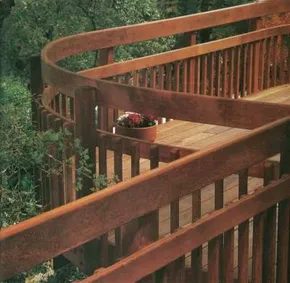
Railings aren’t just code requirements. On elevated decks, they define the silhouette.
If you stick to the standard crib-style railing, you get simplicity. Straight lines. Easy to build. But it looks generic.
You can break the monotony with a few tweaks:
- Swap balusters for tubing. Use narrow tubular piping instead of traditional stringers between posts. It feels modern and lighter.
- Shorten the verticals. Let the balusters stop short of the top cap.
Why do that? It opens up the view when you’re sitting down. You see the yard, not just wood.
Safety first. Check your local building code for required height and spacing before you start cutting.

Balcony Railing Options for Views vs. Privacy
You have a choice to make. Do you want to see out, or do you want to hide?
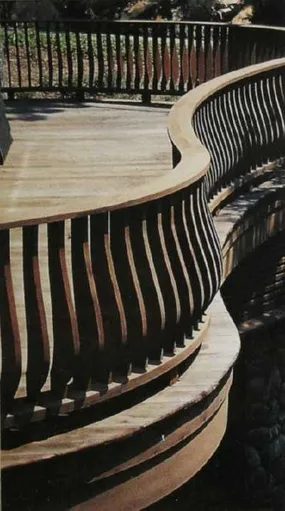
If unobstructed views are the primary goal, skip the heavy wood. Use plexiglass inserts. Or go with stainless steel cable. Wire mesh screening, also called welded fabric, works too. All three are safe, contemporary alternatives to traditional railings. They let the light in and keep the sightline clear.
Want more privacy? Maybe you are tired of street noise. Switch the concept entirely. Build a solid half-wall. A low lattice fence works well here. Top it with planters for a softer look. Greenery helps muffle sound and breaks the hard line of the structure.
The decision comes down to your specific site conditions.
- Max visibility: Plexiglass, stainless steel cable, or wire mesh.
- Privacy and noise reduction: Solid half-wall or low lattice fence.
With a little planning and imagination, the choices are endless. Measure twice before you cut.

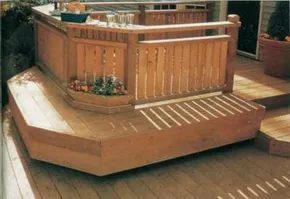

Built-in Deck Benches: Comfort, Space-Saving, and Placement Strategy
Why Choose Built-In Benches Over Loose Chairs
Built-in benches save floor space. That’s the main win. Instead of pushing four chairs around every time you host, you get a fixed seating arrangement that anchors the deck’s perimeter. You reclaim the middle of the deck for dining, grilling, or just moving around.
They also hold their shape. A built-in bench can be a design focal point, showing off wood grain, joinery, or a specific finish. Or it can disappear into the background, letting your view or a fire pit take the spotlight. It’s up to how you build it.
Sizing It Right: Depth and Comfort
Comfort is non-negotiable. A bench that’s too shallow feels like a perch. You’re not sitting; you’re perched.
For two people to sit comfortably, you need adequate depth. Aim for a seat depth that lets people relax, not just sit. If you want to go bigger, a long, deeper-than-usual bench works as a sunbathing platform. Add thick cushions, and it becomes a nap spot.
Placement: Managing Sun and Shade
You can’t move a built-in bench out of the glare. So placement is critical.
Don’t just pick a corner. Look at how sunlight moves across your deck through the day. Position the bench where it gets sun in the morning and shade in the afternoon, or vice versa. This gives you flexibility. If you want to read in the morning light and chat in the evening shade, that’s where the bench goes.
Consider your deck’s orientation. Check the sun path. A bench on the north side of a southern-hemisphere deck (or south side in the north) will have different light exposure than one on the opposite side.
Design Flexibility: Focal Point or Background
Your bench can be the star. Use unusual wood species, contrasting stains, or detailed crafting to make it pop. It becomes a piece of furniture you look at.
Or keep it low-key. Match the deck material. Blend it in. Let the landscape or a hot tub be the focal point. The choice is yours, but decide before you start cutting.
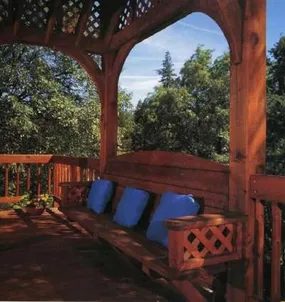

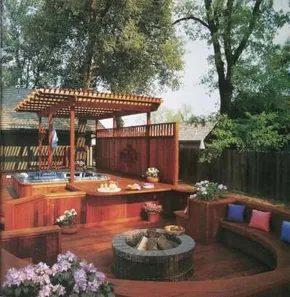

Integrating Firepits into Deck Structures
A firepit isn’t just another fixture. It’s a vibe shift. Like that campfire that kept the group talking long after the food ran out, a firepit pulls people in. It warms hands. It stretches your usable deck season into the cool evenings and brisk days. Without it, the deck is a table and chairs. With it, the deck is a room.
Placement matters. You can set a firepit on the ground near the deck, which is the easiest route. But if you want it built right into the structure, you have to plan around weight and heat. The base needs to sit directly on the ground. That’s non-negotiable for safety and load distribution.
On-grade decks make this straightforward. Raised decks get trickier. You’ll need to build the base up to deck height using concrete blocks or masonry units to meet the structure. Don’t skip the lining. Heat-resistant firebrick goes inside. You can use decorative brick or natural stone for the outer edging if you want a softer look, but the interior has to handle the temperature.
Height is a specific constraint. The pit walls need to be tall enough to shield the surrounding deck boards from radiant heat and direct flame. If the boards get scorched, you’re replacing lumber, not enjoying the night.
Not everyone wants to build a masonry pit. A freestanding metal woodburner is a valid alternative. These are often dish-shaped, stand on legs, and can be set on a protected surface on the deck itself. Less construction, more flexibility, but you still need to manage the heat source.
The goal is extending the life of the deck as an outdoor room, not just adding a heat source.
If you’re building the masonry version, check your local codes. Firepits integrated into structures sometimes trigger different inspections than standalone units. The materials are standard: firebrick, mortar, concrete blocks, or stone. The tools are basic: trowel, level, mason’s hammer. The safety gear is standard: eye protection, gloves, and a dust mask if you’re cutting stone.
Why does the base need to be on the ground? Weight. A full firepit with masonry is heavy. If you try to hang that off a deck joist, you’re risking structural failure. The ground takes the load. The deck just provides the surrounding surface.
Which material holds up better? Firebrick is the standard for a reason. It’s dense, heat-resistant, and cheap compared to decorative stone. If you want the aesthetic of natural stone, use it for the outside trim. Keep the firebrick in the bowl. The difference in cost is negligible compared to the replacement cost of a cracked decorative stone liner.
Can you put a firepit directly on deck boards? Yes, if it’s a freestanding metal unit. Use a fireproof mat or a steel plate underneath. The metal legs concentrate weight, so check the board integrity. A masonry pit, however, belongs on the ground. Trying to build a masonry firepit directly on wood without a ground base is a bad idea. The heat will damage the wood, and the weight will stress the joists.
The conversation around a firepit is the point. The warmth is the enabler. Design the seating to face the pit. Keep the radius tight. If people
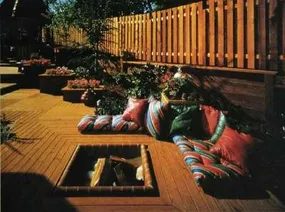

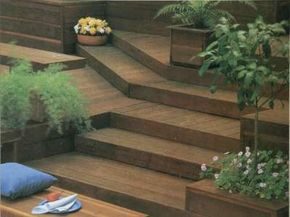

How to add cheap color to your wood deck without painting
You built the deck. It’s sturdy. It’s wide. It’s also probably a lot of brown. That’s fine. Sometimes the monotony gets to you. You want something that pops, but you don’t want to rip out the boards or spend a fortune on new furniture.
Planters are the fix.
They are the cheapest way to change the visual weight of an outdoor space. You don’t need a contractor. You need pots, soil, and a sense of where to put them.
Where to place deck planters for maximum impact
The position changes the function. If your deck has railings, look at the posts. You can mount a planter box on top of a post. Or, you can integrate the box into the railing design itself. This creates a continuous line of green that ties the structure to the house.
For decks that sit close to the ground, the edge is your canvas.
Group planters along the perimeter. This defines the space. It tells people where the deck ends and the yard begins. Use them to mark a staircase. Put one at the top, one at the bottom. Or place them where the deck changes levels. This breaks up large, flat areas into manageable zones.
Can you grow vegetables directly in your deck floor?
Yes. If your deck is on-grade, meaning it sits on the dirt, you have another option.
Cut openings in the deck floor.
This allows plants to root directly in the ground. No potting soil. No watering can. The plants grow right out of the deck. It’s a bold look. It makes the deck feel less like a platform and more like part of the landscape.
What plants actually work in deck planters
Color is the obvious benefit. But you get more.
With proper drainage, you can grow:
- Annuals and perennials for long-term blooms and fragrance.
- Cherry tomatoes for quick summer snacks.
- Peppers for heat and visual interest.
- Strawberries for fruit that grows in contained spaces.
Even in winter, you aren’t stuck with bare wood. Small berry-producing shrubs keep things looking alive. They add seasonal color when the flowers die back. It’s not just decoration. It’s a small, manageable garden that sits right where you eat or sit.
Just remember: drainage is key. If water sits in the pot, you lose the plant. And you don’t want that on your wood.
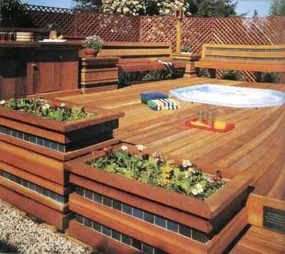

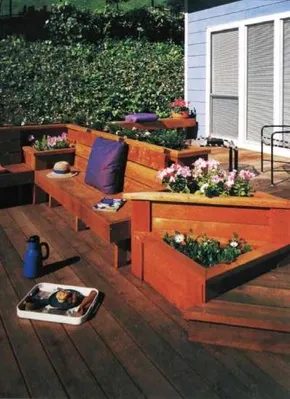

How to Build Planters That Don’t Rot
Built-in planters solve a specific problem. You want greenery on your deck, but you don’t have square footage to waste on free-standing pots. This is especially true for small decks.
Cluster them. Put them in a tight group on one side. Or place them at changes in deck levels. This keeps the center of the deck open for walking. You gain traffic flow without losing your garden.
On larger decks, the rules are looser. You can use large planters as privacy screens. Fill them with tall, bushy plants. Add a vertical trellis. Done.
A clever trick for small spaces: build the planter wall as the backrest for a bench. Cap the top with a flat board. Now you have a shelf. Set down plates. Pour a glass. No extra furniture needed.
Which Wood Lasts in Soil and Water
Material choice matters. A lot. If you use the wrong lumber, your planter will rot from the inside out.
You need wood that resists decay. Redwood is a popular choice for deck projects. It holds up well. But you cannot just buy any redwood.
Look at the grade.
You want heartwood. This is the center of the tree. It is dense. It is naturally resistant to rot. It handles the constant moisture from soil and rain better than sapwood.
Check the label. If it says “construction heart” or “all-heart,” buy that. Avoid grades that mix sapwood with heartwood. The sapwood will fail. The planter will fail.
Heartwood is cut from the center of the tree and is naturally resistant to rot when exposed to water and soil.
Step-by-Step Material Selection
- Identify the species. Redwood is a strong candidate. Other rot-resistant species work too.
- Check the grade. Ensure the label specifies heartwood or all-heart.
- Inspect the boards. Look for knots. Avoid large knots in the bottom boards if possible, as they are weak points.
- Plan the assembly. If building a bench-back planter, ensure the cap board is level. This is your serving surface.
Tools you will need:
- Circular saw
- Drill with bits for decking screws
- Level
- Square
- Measuring tape
Safety note: Wear eye protection when cutting. Soil retention requires precise fitting. Gaps leak. Leaks rot wood. Fit boards tightly.
The choice between a small cluster and a large privacy screen depends on your deck size. A 100-square-foot deck needs the compact, bench-integrated design. A 300-square-foot deck can handle a standalone screen planter. Measure first. Buy lumber second. Build third.
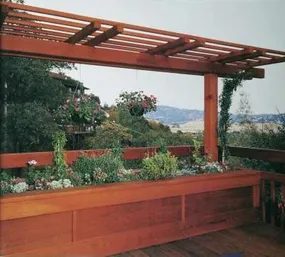
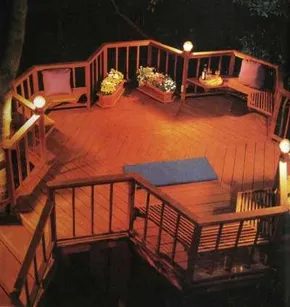

Low-voltage deck lighting: why it beats standard fixtures for outdoor safety and style
Standard exterior house lights work. If your deck sits right against the siding, a few wall sconces might get you by night. But that’s about it. You’re left with harsh glare, blind spots on the stairs, and zero atmosphere.
Low-voltage lighting changes the dynamic. It’s the standard for a reason.
- Safety first: Even if you nick a wire or leave a connection exposed to rain, you’re not looking at a shock hazard. You’re looking at a dead bulb.
- Cost: The power draw is negligible. Your electric bill won’t blink.
- Installation: You don’t need a licensed electrician for every run. It’s manageable for a competent DIYer.
Which fixture types fit which part of the deck?
Don’t just scatter lights everywhere. Map the function first.
Surface and Deck Lights
These are low-profile. You screw them flat onto a surface.
* Where: Railing posts, side of a bench, front face of a planter box, vertical edge of a step.
* Why: They cast a soft glow without blinding guests. They outline the structure.
Tier Lights
These spread light evenly in a 360-degree or wide arc.
* Where: Top and bottom of stair treads, center of the deck floor, under seating areas.
* Why: This is where you actually see where you’re stepping. Tier lights eliminate the “trip hazard” factor.
Floodlights
High intensity. Directional.
* Where: Aimed at a feature. A pool edge. A spa. A specific tree in the yard.
* Why: Ties the deck to the landscape. Highlights a design element.
Why not just use high-voltage?
You can. But why would you? High-voltage requires GFCI protection, more complex wiring, and higher risk. Low-voltage gives you the aesthetic flexibility to place lights exactly where they look good, not just where the wiring conduit goes.
“Lighting specifically designed for the deck is a detail worth having.”
It’s not just about seeing. It’s about staying out there longer. The light tells you the night is still good.
Practical installation notes
Check your transformer size. Count your fixtures. Factor in the wattage. If you run out of power, the lights will dim, and you’ll be troubleshooting a transformer instead of enjoying your beer.
Also, think about the source. Is the deck close enough to a house outlet? If not, you’re looking at a longer cable run. Low-voltage systems are more forgiving of distance than high-voltage, but you still want to keep the run reasonable to maintain brightness.
Start with the stairs. That’s non-negotiable. Then move to the perimeter. Then decide if you need a feature light.
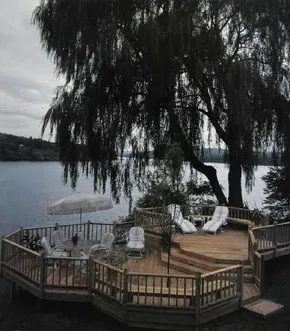

Traditional Looks Without Wood
Wood isn’t the only option if you want that classic look. Composite decking mimics the grain and texture of real timber without the rot risk. It’s heavier to work with, and the cutting dust is nasty, so wear a respirator. But it holds up well against moisture and insects.
Vinyl offers another route. It’s cheap, low-maintenance, and comes in a variety of colors. However, it can look a bit plastic if you’re not careful with the hardware. Use stainless steel fasteners to prevent rust staining.
Concrete pavers are the heavyweight option. They’re durable and stable, but they turn the project into masonry work. You’ll need a level base, a compactor, and a lot of patience. Once set, they’re effectively permanent.
Choosing the Right Material for Your Climate
Your local weather dictates what will last. In humid climates, pressure-treated pine is still a viable budget choice, but seal it annually. In dry, sunny areas, cedar or redwood resist warping better than softer woods.
Check local building codes before you buy material. Some jurisdictions require specific footing depths or fire-rated materials for detached structures. A quick call to your local building department saves headaches later.
Safety Checks Before You Start
Verify property lines. A freestanding deck that encroaches on a neighbor’s land invites disputes. Use a measuring tape and a stake-and-string method to mark boundaries.
Inspect the ground for underground utilities. Call 811 in the US or your local equivalent before digging footings. Striking a gas line is a disaster you don’t want on your resume.
Common Mistakes to Avoid
Skipping the subframe leads to sagging. Even if the deck sits low to the ground, you need a solid joist structure to distribute weight.
Ignoring drainage causes rot. Ensure water can flow away from the deck supports. Use gravel backfill around footings to prevent pooling.
Underestimating wind load. A detached deck has no house to brace it against. In windy areas, add diagonal bracing to the frame to prevent swaying.
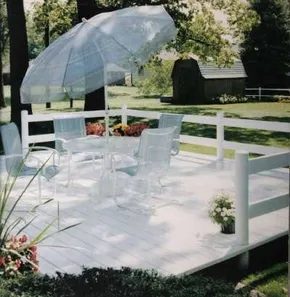
Why PVC Vinyl Outperforms Wood in High-Moisture and UV-Heavy Climates
Wood looks good on paper. It also rots in the rain and splinters in the heat. That is the reality of natural fiber decking in wet or sunny zones. UV rays break down the surface layer over time. Paint fades. Mildew moves in if the sealant fails. You are either buying the material or buying the maintenance schedule.
PVC vinyl solves the decay problem by design. It is a synthetic composite that does not absorb water the way oak or cedar does. You do not need to strip it. You do not need to restain it every two or three years. The board stays structurally intact through freeze-thaw cycles and intense afternoon sun.
How to Choose a Synthetic Decking System That Matches Your Home Exterior
You have options beyond a single beige plank. Modern PVC lines mimic grain textures with laser-etched surfaces. Some offer a traditional look that fits a ranch home. Others use a sleek, single-color profile for a contemporary build.
Check the railing systems before you buy the boards. The deck frame and the handrail need to work together visually. A black powder-coated metal rail looks different from a wood-look composite rail. If your house has a specific architectural style, pick a system where the railing design harmonizes with the facade, not just the floor.
Does PVC Vinyl Decking Require Any Cleaning at All?
It requires almost none. Rain washes dirt off the surface. You can hose it down once a year if you want to be thorough. There is no paint to peel. There is no wood fiber to check for rot. The material does not warp under foot traffic or temperature swings.
Compare this to a treated pine deck. That wood needs a sealant application. It needs a brush. It needs drying time. It needs a ladder if the deck is elevated. PVC removes the annual ritual. You buy the system once. It stays that way.
- Weather resistance: PVC does not rot, warp, or splinter.
- Color retention: The pigment is part of the material, not a surface coating.
- Style flexibility: Available in traditional wood-grain or modern flat profiles.
- Railing compatibility: Multiple design options for varied house styles.
The maintenance gap between the two materials is not small. It is the difference between a project and a property.
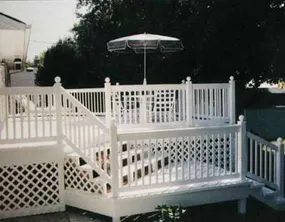

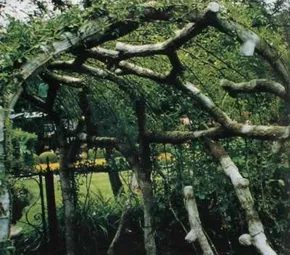

Stylish Supports for Plants
Trellises are probably the most common structure you’ll see holding up greenery. They are practical, look good, and cost almost nothing to build. You take thin wood strips, nail them together in a lattice or open-weave pattern, and boom, you have a frame with a slender profile.
How do you actually use one? You have three main options:
– Attach it to a wall
– Stand it alone on a sturdy base
– Hang it overhead
If you put it overhead, it does double duty. It supports climbing vines and acts as a sunshade. But don’t just think of it as plant support. A trellis works as a privacy screen, too. It’s a cheap way to hide an ugly utility yard or block out a view you hate.
Arbors are similar but different. They are usually wood, just like trellises. The big difference? An arbor is freestanding and has space underneath. You can walk through it, sit in it, or tend to shade-loving plants beneath the canopy.
Imagine an arbor covered in grapes or blackberries. It becomes part of your vegetable or flower garden. It is a social spot, too. Adults and kids can gather there to harvest fruit. It turns a functional structure into a gathering point.
Embracing Trees With a Surround
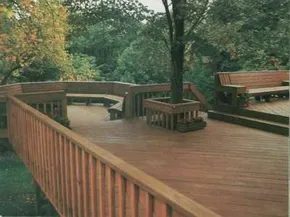
Building a Deck Around a Tree: Preserving Roots and Shade
You want the privacy and windbreak that a mature tree provides. You also want a space to hang out. The conflict is real. Moving a big oak or maple to clear ground for a patio is a disaster waiting to happen. Roots get severed. The canopy suffers. You end up with a dead tree stump in the middle of your yard and a lawsuit.
Wood decks solve this. They are flexible. You can build right up to the trunk. You can leave a hole where the bark meets the wood. The tree stays. The roots stay. The air flow around the base doesn’t get choked by pavers or concrete.
The hole matters. Make it big enough for the girth to expand. If the tree is still young, or if it’s a fast grower like a willow or birch, don’t cut it close. Give it room. A tight fit today means a split deck board in three years.
Seating Options for Tree-Centered Decks
Benches belong under trees. It feels right. A standalone seat tucked against the trunk works. Or, wrap the whole thing. A circular bench that encircles the tree creates a natural gathering spot.
You can also build a low wall above the deck surface. Make it wide enough to sit on comfortably. Twelve inches is a good baseline. Raise it high enough to double as a railing. This gives you a double-duty structure. Safety barrier and lounge area.
Plant shade-loving flowers and small shrubs in that elevated space. Check the soil and water needs first. The shrubs you pick have to match what the tree wants. If the tree thrives in dry, sandy soil, don’t put a fern there. Match the conditions.
“The opening around the trunk, however, should be large enough to allow for continued growth, especially if the tree is young or a rapid grower.”
Check your local codes for railing heights. Measure the trunk diameter now. Add at least 2-3 inches for future growth. Use a circular saw for the hole. Bevel the edges so bark doesn’t rub raw against wood. Seal the wood. Let the tree breathe. Let the deck hold.