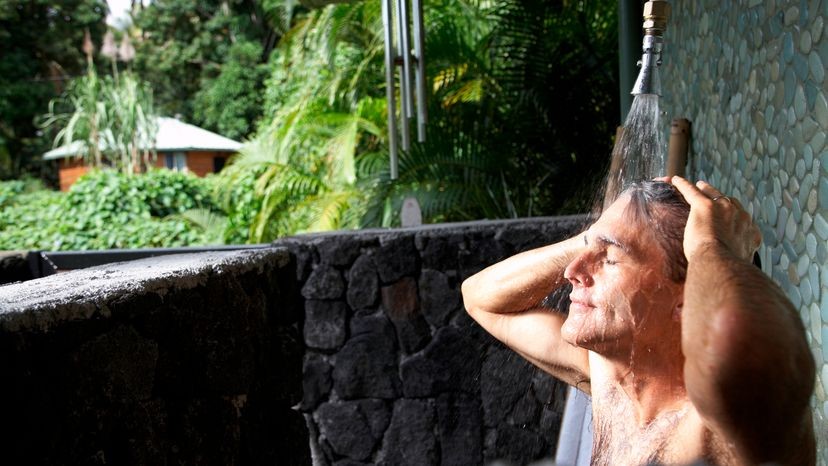
Outdoor showers are more than just luxury. A working solution for muddy feet, chlorinated skin and grassy knees. You can rinse it before the pool or after hauling mulch. This family doesn’t track dirt in the living room. Simple.
But it’s also about the atmosphere. Cold water was poured on hot skin. The sun is shining on your back. Maybe there’s a full moon overhead. If you have a view of your backyard, you stand in it. The sensory rewards are real.
These projects are popular because they are very simple. No crew needed. All you need is a plan. And the right stuff for your garage.
What you need for installation
Every model is different. Separate units cost less than units plumbed into your home’s main line. However, the core material remains the same. Start by drawing the layout. Next, get these products.
Pipeline Basics
Cold water flows through the PVC. Hot water requires CPVC. The length of the pipe depends on the distance. Is it close to home? Short runs. Far? More fittings, more labor.
Fixtures matter. Bronze, copper and brass handles are more durable than plastic handles. Will not corrode or fade. Look for them.
Here’s what you need:
– PVC cutters
– pipe wrench
– pliers
– PVC glue
– Thinset mortar (for tiling)
If you are not comfortable soldering or gluing pressure lines, hire a professional to perform this step. This is not a failure. This is risk management.
Back wall
If you are building along an existing wall, you may need to remove the siding. Replace it with a 4-foot-wide by 10-foot-high cement backer board. This becomes the foundation for tile.
Required tools:
– circular saw
· Screwdriver for board attachment
– Trowel for thinset
– Ceramic tiles (ceramic, stone or slate)
This is not drywall. It cannot withstand rain or moisture. The durability of the cement board cannot be compromised.
Enclosures and Privacy
No walls? Just a floor and one header. Open to the wind. Loses privacy. Gains airflow.
Do you need privacy? Choose one:
– Glass brick wall (durable and modern)
– Cedar or teak stalls (weather-resistant wood)
– Prefabricated wooden shell (treated for rot)
– Semicircular shower curtain with rod (cheap and flexible)
Glass blocks are expensive, but practically unbreakable. Cedar has a lovely scent and rots very slowly. Curtains are a temporary solution that can be useful in a pinch.
Floor
Concrete is standard. Mix gravel as a base. Pour concrete over it. Let it cure. Add texture. Non-slip is important. Wet concrete is slippery.
Want stone look? Layer ceramic or stone tiles on top of hardened concrete. Uses exterior-grade thinset. The mortar must be waterproof.
Add-Ons for Comfort
Shelves for soap. Hooks for towels. Pegs for robes. Keep it simple. Only weatherproof materials. Metal hooks rust. Plastic hooks crack. Stainless steel or teak pegs last.
Where do you put it?
Location determines price and comfort.
Plumbing your home means cutting into walls. Running lines through the yard meant a trench. Digging trenches is more difficult than wall work. However, you can prevent siding damage.
Choose a site with good drainage. The water has to go somewhere. A gravel base helps. Sloped floors help.
Think about sun exposure. The morning sun warms your body. The afternoon shade will keep you cool. At night, your neighbor’s windows can compromise your privacy.
Check your local code. backflow preventers may be required in some areas. Others mandate specific pipe depths. You can avoid future problems by call to your municipal building office.
Decide on a water source. Is it hot or cold? both? Hot means tapping into your heater. Cold means running a new line. Both increase costs.
Start small. Build the frame. Test the plumbing. Tiles will be added later. You can upgrade at any time. However, once set, it cannot be easily reversed.
Location determines action. If you just want to wipe the yard before entering the house, tuck the shower against an exterior wall near the front door. You can save steps. You keep the mess contained. However, if this is a flushing station for pool users, move it to the pool’s perimeter.
“It’s no use showering near the house and walking across the garden with wet feet in the dirt.”
Think about the view. Do you have a valley? A lake? Or is it just a patchwork of colorful perennials? Aim your shower for the best view. If you’re going to stand naked in nature, the exposure is worth it.
Where the pipe is installed
Plumbing needs are dictated by proximity. If you want to tying into your home’s existing lines, place the device next to the kitchen or bathroom. You cut into the wall instead of the foundation. You’ll save on pipe runs.
If you want to control the temperature, you need two types of pipes. Use PVC when handling cold water. Use CPVC for hot. Install fixtures for both outside. If you skip hot water, you are limited by the temperature of your surroundings. A quick wash in July will do the trick. It’s miserable in October.
Height and practicality
Position the main shower head about 7 feet (2.1 meters) off the ground. This works for most adults. However, consider adding a secondary fixture lower down. Place a second head and the faucet handle a few feet from the ground.
Why? Feet must be washed. Legs need scrubbing. If you have a dog, it needs a rinse too. The low-profile mount prevents you from arching your back over the garden hose. It keeps the main shower clear for the adult.
Soil and drainage
The ground must be level. Soft soil is suitable. If your garden is compacted clay or rocks, you need to design a drainage system. The water has to go somewhere. Without soft soil to absorb it, you’re creating a mud pit. To make matters worse, you might end up with frozen ice patch in the winter.
Decide if you want sun or shade. Most people want sunshine. It warms your body. The soil dries out faster. If you place it in a sunny spot, you’re less likely to be standing in a puddle of water that will never evaporate. Shade keeps the water cooler. Choose based on climate and cold tolerance.
Cover the Exposed House Wall
After installing the pipe, you need to address the hole in your siding.
After the pipe is attached to the outside of the house, the next step is to fill the gaps. Aesthetics aren’t the only thing we’re looking for here. It creates a moisture barrier. If you skip this step, water will enter the wall cavity. Rot follows. The standard repair is cement backer board.
Why a cement support board is the best choice
There’s a reason why this material is the industry standard. Pre-cut concrete slab, reinforced with mesh. It won’t swell or rot even when wet. Installation is very easy. Attach to studs or frame with screws. But there’s a problem. Before closing the pipe or valve, you need to cut holes.
Measure twice. Cut it once. Use a utility knife or scoring tool to make deep cuts along the marked lines. Drill pilot holes in these marked corners. Then switch to a jigsaw or reciprocating saw to finish the cuts. Wear safety glasses. Cement dust is harmful to the lungs and eyes.
“Cement-based boards provide a stable, waterproof surface suitable for tiling.”
The real win? This board is ideal as a base material for ceramic tiles. It’s tough. It’s flat. Once the board is installed, you can start decorating.
Design a separate shower wall
Not all backyard showers are connected to the house. If the unit is freestanding, it must be built to withstand the weight of the pipes and water.
You have options. The fastest way is one vertical post. Place treated wood or metal posts about 1 foot into the ground. Pour concrete around the base and secure it in place. It’s very simple. It is very practical.
However, if you want more utility, build a wall. Weather-resistant wood and tile masonry is suitable. Aim for a width of 3 to 6 feet (0.9 to 1.8 meters). The large surface gives space for attaching pegs and hooks. Hang robes. Drape clothes. Install soap and shampoo caddies.
This is an important product notice. If you have a freestanding unit with a drainage system, use eco-friendly bathroom products. Harsh chemicals can violate local gray water regulations and negatively affect the surrounding ecosystem.
Floor-based installation
Before laying the tiles, you need a floor that drains. The water has to go somewhere. The most common way is to pour the concrete slab with a slight slope towards the drain or dry well.
If you are building on a deck or raised platform, use pressure-treated wood for the frame. Add a layer of exterior grade plywood or cement board. Seal all seams. The goal is to create a surface that drains water efficiently without rotting from the inside out.
When the base is flat and properly sloped, you are ready to ready for the final layer. That’s where ceramic tiles come into play.
The floor creates an atmosphere. Must be non-slip. If you want to get it done quickly, a regular paver will do just fine. Another option is to use a small wooden deck using pressure-treated lumber. Gravel is an option, but it felt uncomfortable underfoot and tracks everywhere. Concrete is a durable choice.
To pour a concrete slab, first dig a square or rectangle. Make a wooden frame to hold the mixture. Spread gravel on the bottom and level. Pour the concrete to the level of the wood. Tilt the body slightly towards the drain. You need runoff, not stagnant water.
For better grip, use a broom finish. Wait until the concrete partially hardens. Drag the bristles of the brush across the surface in a swirly pattern. If your floor is sloping, make the broom marks run towards the edges. This guides the water away.
Selection of back wall tiles
Ceramics, slate and glass are standard materials for the back wall. Stacked river rock is gaining traction, too. You’ll need thinset mortar. Check with your supplier if this type is compatible with your tile and application. First, apply the mortar to the cement backer board. This way the tiles stick properly.
There is a problem with standard tiles. Ceramics, slate and glass often require cutting. You may need to cut separate pieces to fit neatly around the edges of the cement board. This depends on the size and pattern of the tiles.
River rock sheets solve this problem. You can change the size simply by cutting the mesh backing. This results in smooth, clean sidewall edges without complicated installation.
River stones come in different sizes. Common sizes are 12″ x 4″ or 12″ x 12″ square. Prices vary. You will probably pay more than for natural stone or ceramic, or about the same amount. It is up to you to choose.
Designing the Side Enclosures
The side walls have two purposes: privacy and wind protection. There is no need to close it completely. Open slats allow air to circulate and dry the structure faster. Closed sides offer more seclusion.
Consider using the same material as the back wall to maintain continuity. If you chose stacked river rock on the back, use it on the sides to create a cohesive look. Alternatively, you can use cedar or redwood slats. These woods resist to rot than pine. Space the slats about 1 inch apart. This way the water can drain through and the air can circulate.
If you want a solid wall, use the same cement backer and tile method as the back wall. Note that the sidewalls are exposed to more direct spray as well as wind-driven rain. Seal all grout lines completely. Use exterior grade sealant on the wood frame behind the board.
Privacy is a personal choice. Some homeowners prefer fully enclosed showers for the maximum seclusion. Some people like the open-air feel. There are no right or wrong answers. Make sure the structure is stable. Secure the frame to the ground or to a sturdy base. In tall and narrow structures, wind can be a big problem.
The side walls determine the character of the shower as much as the floor.
Let’s think about height. Normal shower height is efficient, but higher walls offer more privacy. It also blocks more wind. If you are in a windy area, go higher. If you are in a sheltered spot, a low wall may be enough.
The material is also important here. Metal frames can rust if not protected. If the wood is not sealed, it can warp. Although concrete blocks are durable, they are cold to the touch. Choose based on climate and aesthetics.
Water draining from both sides requires planning. If the walls are solid, spray towards the center of the floor. If there are slats, the water will fall through. Ensure the ground beneath is graded away from the shower base. You don’t want mud pooling around your foundation.
Water doesn’t care about property lines. Leaving a free-standing shower or shower in your home will lead to waste water going exactly where you don’t want it. We need to direct that flow.
If your shower is next to your garden, directing the water toward the beds is in everyone’s best interest. Plants get thirsty. But what if the back wall of your shower is bolted to the exterior wall of your home? You need to pull that water away from the foundation. You can’t afford pooling near the base of your house.
Create a barrier. The height of the border on both sides of the concrete slab is approximately 5 inches (12.7 cm). Glass blocks are popular here. Allows light in while stopping the splash zone.
Apply thinset to the left and right edges of the concrete floor. Next, arrange the blocks from front to back. Use Thinset between them to secure them. This is not just structural. This is a dam.
Need more privacy? Assemble these glass blocks vertically. Can be lifted from both sides for complete privacy. Next, install the shower curtain rod between the walls. Hang the curtains. Done.
Backyard shower: finishing the floor
Before you hang the shower head or connect the faucet, you need to treat the floor. This is the last step.
You don’t have to go out. The previously mentioned concrete brush finish is practical. Rough enough to provide traction. You can leave it as is.
However, if you want to make it luxurious, you can also use tiles. ceramic products. slate. Any of the non-slip tiles mentioned in the previous section.
If you use stacked river stones on the back wall, combine it. River stones are used for the floor. It pulls the look together. Glue the river rock mesh (usually 12″ x 12″ (30.4 cm x 30.4 cm) square) with Thinset.
Once that’s configured, you’re ready to plumbing. Solid structure. Water has a place to go. or not. Depending on how you finished.