Don’t throw away old kitchen sheets. Faded towels and washcloths are gathering dust in your linen closet and have reached the end of their useful life. In less than an hour, you can turn your old towels into durable, heat-resistant pot holders. These homemade versions are often more durable than the disposable cotton squares you buy at the grocery store because you can control the density and number of layers.
Collect tools and materials
This does not require a full workshop. Just a few basics.
Tools:
– tape measure
– ruler
– A pencil
– scissors
– Sewing machine
– 8-inch plate (for drawing circles)
– Straight pins
Material:
– Old towels or bath washcloths
・Cotton fabric scraps (for facing, optional)
– Thread
– Prefolded bias tape
– *Note: Use cotton thread instead of polyester thread for better heat resistance. *
Step 1: Cut and cover the fabric
Bring the towel. Lay it flat. Cut out squares from the best, thickest parts of the fabric. An 8” pot holder is standard, but if you have larger hands or need more isolation, go larger.
If the towel is thin, you need bulk. Cut at least two squares. if the fabric is light, you will need 3 or 4 squares. Washcloths work differently. Usually thick enough to use as individual squares.
For a practical look, leave the sides of the towel exposed. Absorbs heat well. If you want something fancier, cut matching squares from cotton scraps. These will act as the top and bottom facing.
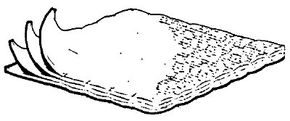
Stack them. Bottom towel square. Cotton facing (right side up). Middle towel square. Top cotton facing (right side down). The towel layers should be sandwiched inside. Pin the edges to prevent them from moving.
Step 2: Quilt the Layers
This is where thermal protection takes place. Loose layers will slip. Quilted layers stick.
Feed the stack into your sewing machine. No need to worry about perfection. Sew parallel lines about an inch apart across the entire square. Straight stitching is enough.
Rotate the square 90 degrees. Stitch again. This creates a grid. It locks the layers together. You can also stitch diagonally for diamond patterns or free-form loops. The goal is to secure the layers. The more stitches, the better the insulation.
Step 3: Shape the Pot Holder
When the quilting is complete, trim the edges. If you want it to be square, use a ruler and pencil to create sharp corners.
Want a circle? Place an 8-inch plate on the center of the quilted square. Trace around it with a pencil. Cut along the line. Remove the plate. Trim any loose threads.
Step 4: Finish the Edges with Bias Tape
Uncut edge wear. Seal with masking tape.
Take a piece of pre-folded bias tape. Start in the corner. Align the wide side of the tape with the edge of the pot holder. Fold the narrow side of the raw edge back. Lock in place.
miter angle. This means bending the strip at a 45 degree angle to make a tight turn. If you want to draw a circle, loosen the tape from the curve. Do not stretch the tape. Stretching can cause cracks later. Edited often.
Leave about 2.5 inches of extra tape around the edges. You will need this to make the hanging loop.
Step 5: Sew and add loops
Sew close to the inside edge of the bias tape. Use a zigzag stitch if your sewing machine allows it. It adheres to the edges better than straight stitches.
Finally, use a 2.5 inch tail. Fold it to form a small ring. Sew a loop to secure it. Next, continue sewing the tape to the end of the pan holder. Backstitch at the beginning and end to lock the thread.
Cut off the excess tape. Turn the potluck right side out. It needs to be hard and thick enough to sit on top of the stove.
Why this works better than store bought stuff
Mass-produced boilers often use thin wadding or synthetic fibers to melt and conduct heat. Cotton towels are a natural fiber. It burns before it melts. Overlap and sew tightly to create air gaps and insulate your hand.
The edges of bias tape are also stronger than rolled hem fabrics. Withstands wear and tear caused by repeated washing and high temperatures.
Safety instructions
Be sure to test your pot bags. Use first on a cold frying pan. Make sure the seams are tight. If the masking tape begins to fray, re-sew it immediately. Loose ends can cause a fire or expose the heat generating fabric.
Place these on the counter. Also perfect as a gift. Wrap in cellophane and label. Or use it until it burns. Then cut them into rags. Nothing goes to waste.