You can’t build much without a drill. It’s the backbone of every home improvement project, from hanging a shelf to assembling flat-pack furniture. But owning the tool is only half the battle. The real trick lies in knowing how to drill pilot holes correctly.
Skip this step, and you risk splitting your wood, stripping your screws, or ruining the aesthetic of your work. We’re going to break down exactly why these small holes matter, how to size them right, and the precise steps to get it done without damaging your materials or your tools.
Зміст
Why Pilot Holes Matter
A pilot hole is essentially a tiny guide path. You drill it before driving in a screw, bolt, or nail. Its job is simple: it removes material to make space for the screw’s inner shaft.
Without it, the screw acts like a wedge. As you force it into hard wood or brittle plastic, the pressure pushes outward. That pressure causes cracks. It ruins the look. It weakens the joint.
Accurate placement is non-negotiable. A misaligned hole looks sloppy. More importantly, it compromises structural integrity. Use a sharp pencil or a marker to dot your exact target. This tiny mark is the difference between a professional finish and a DIY mistake.
Choosing the Right Bit
Not all drill bits are created equal. You have brad point bits for clean wood holes. Forstner bits for flat-bottomed precision. Auger bits for deep holes. And carbide-tipped masonry bits for concrete.
For most basic woodworking tasks, a standard twist bit is fine. Keep it sharp. A dull bit tears the wood rather than cutting it, which leads to splintering.
The workhorse of most garages is a 3/8-inch variable speed drill. It handles a wide range of bit sizes and offers the control needed for delicate work. Variable speed is key. It lets you start slow and ramp up only when necessary.
Drilling Standard Holes vs. Pilot Holes
Before we dive into the specifics of pilot holes, let’s look at the basic drilling process. It’s similar, but the mindset is different.
- Check your bit length. Make sure it’s longer than the width of the wood you’re drilling into. You don’t want to break the bit on the other side.
- Pick your bit. Brad point bits are great for wood. They have a sharp center point that grabs the surface and prevents walking.
- Mark the spot. Pencil on the dot.
- Center punch it. Use a hammer and a nail to make a small dimple. This gives the drill bit a place to rest so it doesn’t slip across the surface.
- Start slow. Place the bit in the dimple. Start the drill at low speed. Slowly increase to your working speed.
- Pull out before stopping. Once the hole is done, reduce speed. Pull the bit out. Then switch the drill off. If you cut power while the bit is still in the wood, the bit locks up. You’ll likely break the bit or damage the drill motor trying to pull it free.
Now, let’s look at the specific technique for creating a pilot hole.
How to Drill Pilot Holes Correctly
Drilling a pilot hole requires a different metric. You aren’t drilling for the whole screw. You are drilling for the core.
The goal is to match the drill bit diameter to the inner diameter of the screw threads. Not the outer threads. The inner core. This allows the threads to bite into the material securely without exerting splitting pressure on the wood fibers.
Here is the step-by-step method.
1. Gather Your Tools
You need a drill. A set of drill bits. A tape measure. A pencil. And your screw.
Safety first. Wear safety glasses. Flying wood chips or metal shards are real risks. Gloves add grip and protection, though be careful they don’t get caught in the chuck.
2. Select the Correct Drill Bit Size
This is where most people guess wrong. Measure the inner diameter of your screw. If you don’t have calipers, use this rule of thumb: the pilot hole should be slightly smaller than the screw’s shaft but larger than the thread root.
If you’re unsure, measure the screw. Compare it to your bits. When in doubt, start smaller. You can always widen a hole. You can’t shrink it.
3. Mark and Center Punch
Mark your spot clearly. Use a ruler if you need precision. Then, use a nail and hammer to create that starter dimple. This prevents the pilot bit from wandering. Accuracy starts here.
4. Set Your Depth
How deep should the hole be? It needs to be equal to or slightly longer than the screw’s shank. If it’s too short, the screw head won’t sit flush. If it’s too deep, you might hit something hidden behind the material.
Most drills have a depth stop. Adjust it. If yours doesn’t, wrap a piece of painter’s tape around the bit. Use the tape as a visual guide.
5. Position the Drill
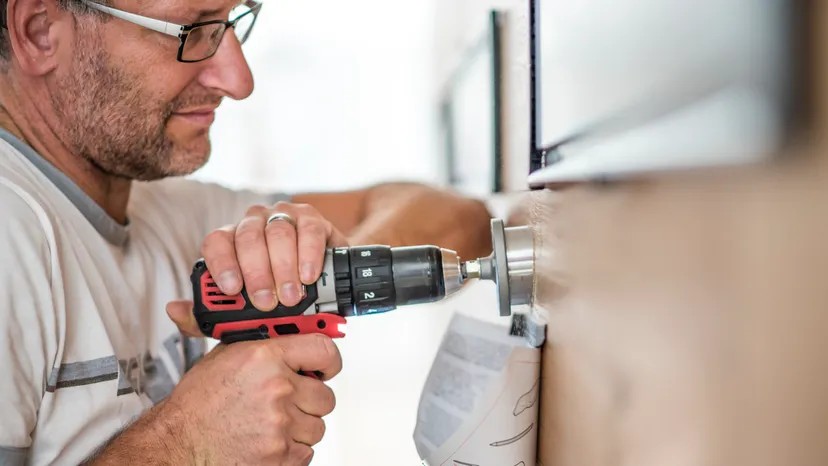
Hold the drill perpendicular to the surface. 90 degrees. If you angle it, the screw will follow that angle. You’ll end up with a crooked fastener. Hold it firmly. Two hands if you need to.
6. Start Drilling
Begin at a low RPM. Let the sharp edges of the bit do the work. Do not force it. Pushing too hard bends the bit. It creates friction. It burns the wood. Once the bit has caught and started the hole, you can increase speed slightly. Maintain steady, light pressure.
7. Clear the Debris
Pull the bit out frequently. Clear the dust. A clogged hole generates heat. Heat damages the bit and the material. A clean hole ensures a clean fit.
8. Test the Fit
Insert the screw. It should go in smoothly. It should feel snug. If it’s loose, your hole is too big. If it requires a hammer to start, the hole is too small.
9. Adjust if Necessary
If the fit is wrong, drill again. If the hole is too small, use a slightly larger bit. Be cautious. Go in small increments. One size up is usually enough.
10. Proceed with Confidence
Now you have a pilot hole that matches your screw. The material won’t split. The screw will hold tight. The assembly will be sturdy.
This might seem like extra work. It’s not. It’s the difference between a project that lasts and one that falls apart in a month. Master the pilot hole. Master the drill. The rest is just assembly.
The real challenge often begins when you realize that even a perfect pilot hole can’t save a stripped screw. But that’s a problem for the next phase. For now, focus on that first, clean hole. It changes everything.
Tackling Angles and Hard Materials
Basic pilot holes are just the start. Once you get comfortable with the straight line, you can start tackling angled drilling. It looks clean on paper but feels tricky in practice. You are fighting gravity and bit wander at the same time. The key is slowing down. Let the bit find its path. If you rush, you’ll get a gouged surface or a broken bit.
Different materials demand different approaches. Hardwood is dense. It fights back. Use a sharp bit and apply steady, moderate pressure. Too much force splinters the grain. Too little friction generates heat, which dulls the cutting edges. Metal is another beast entirely. You need cutting fluid. Without it, the bit overheats in seconds. The steel workpiece also hardens if you dwell in one spot. Keep the drill moving. Use a center punch first to keep the bit from skating across the slippery surface.
Why Precision Matters More Than You Think
You might think skipping the pilot hole saves time. It doesn’t. It costs you later. A split board ruins a cabinet door. A stripped screw hole in metal wastes an entire assembly. The pilot hole guides the screw. It removes material so the screw doesn’t have to displace it all at once. This reduces internal stress. The joint stays tight. The wood doesn’t crack.
When sizing up screws, remember the rule of thumb. The pilot hole for the shank should match the screw’s diameter. The hole for the threads should be slightly smaller. This gives the threads something to bite into. If you use a drill bit that is too small, you risk breaking the screw. Too big, and the screw has nothing to hold onto.
Precision isn’t about perfection. It’s about control.
Keeping It Straight
Getting perpendicular is hard. Eyes lie. Hands shake. Use a square to mark your starting point. Place a block of scrap wood next to your workpiece if you’re drilling into edge grain. It gives you a flat, stable surface to start the bit. Once you’ve made the initial dimple, pause. Check your angle from two sides. Adjust before you commit.
Safety first. Always wear eye protection. Metal shavings fly fast. Wood chips can sting. Secure your work. A moving piece is a dangerous piece. Clamp it down. Then, drill.
The skill comes from repetition. You’ll feel the difference between a clean cut and a struggling bit. You’ll learn which bits last longer. You’ll stop guessing and start knowing. And when that screw slides home without a hitch, you’ll know why you took the time.