The heat of summer is here. What is your first instinct? Turn the ceiling fan to the highest setting. You wait for the wind. Nothing happened. Even worse, the warm air just lazily pushes out into the surrounding area. You blame the engine. You think this device is junk. Before you spend hundreds of dollars on new fan or call a professional, do your research. The problem may be simple. Since last winter, the fan has been rotating in the wrong direction. A small switch instantly restores strong airflow. No tools needed. There are no expenses. This is just a basic mechanical adjustment that most homeowners don’t notice until it’s too late.
Зміст
The hidden switch that changes everything
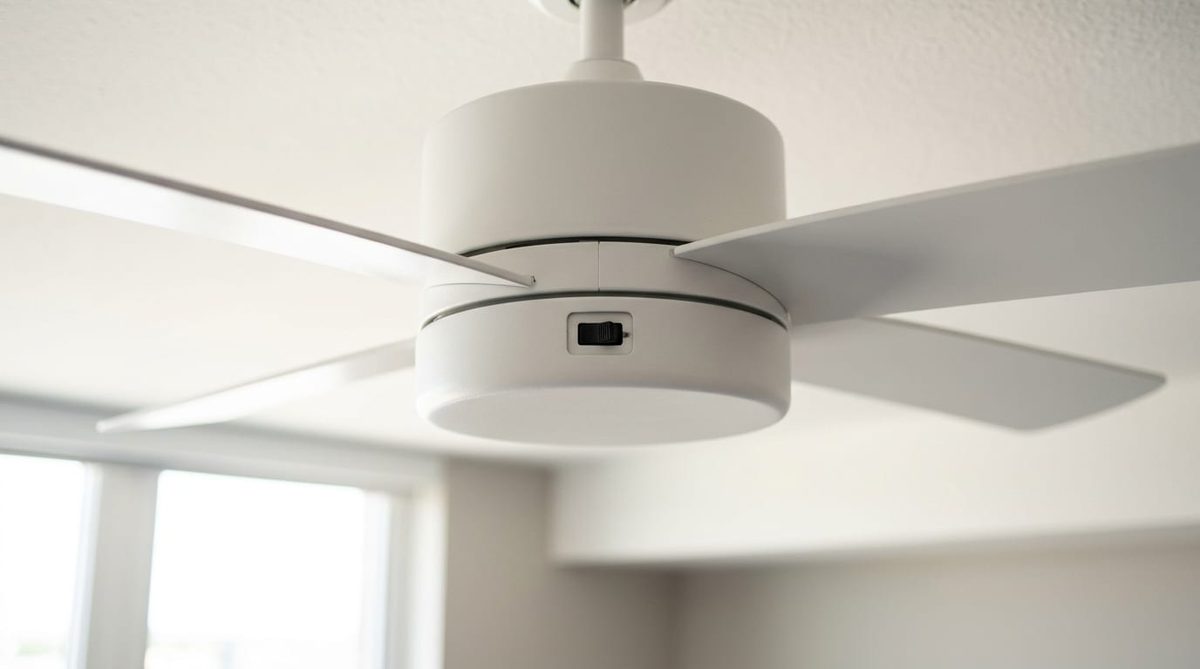
There is a small slide switch in the motor housing, which is often forgotten. It is usually hidden on the side of the central motor block. This switch controls the direction of rotation of the blade. This is the main feature that makes the season comfortable.
In winter, the blades should be rotated clockwise. This pulls cold air up and forces warm air down from the ceiling. It circulates heat even without air flow. But in summer the same conditions are not beneficial. It just keeps moving.
To cool, the blades must be turned counterclockwise. This creates a direct downdraft. It pushes air straight down, creating a wind-chilling effect on your skin. You will feel the coolness immediately. Check the fan switch. When wearing it in winter, flip it. Let’s see what happens. The difference is night and day.
The angle and height of the blade are more important than you think
If changing the direction does not solve the problem, check the blade itself. Height and pitch are important.
Installation height: If the fan is too close to the ceiling, there will be an air gap. You need space to pull it. Leave at least 10 inches (25 cm) of space between the blade and the ceiling. Ideally, the bottom of the blades should be 8 to 9 feet (2.5 meters) above the ground. Is it too low? Dangerous. Too high? The ventilation does not work.
Blade Pitch: This is the angle of the blades. The flat blade cuts through the air like a knife. They don’t move much volume. You need pitch. The optimal angle is 12-15 degrees. This provides a stable thrust.
Over time, vibration can loosen the screws that hold the blade in place. The pitch changes. The fan stops moving air effectively. It can get noisy. Check the blade brackets. Tighten the screws with a Phillips screwdriver. If the blade is bent or at the wrong angle, consider replacing it. A simple blade with the right pitch always beats complicated design and poor engineering.
Safety above all
Before doing anything: Turn off the power at the circuit breaker. It’s not just a switch. breaker. Even if the fan turns off, live wires are still alive. Use a non-contact voltage tester to make sure the power is off. Use a sturdy ladder. Never stand on chairs or other wobbly surfaces.
What should I do if it still doesn’t work?
If the direction is correct, the height is correct, the blades are firm, but the air feels weak, the motor may be faulty. Or the capacitor is broken. Capacitors are cheap. Motors are not. If possible, you can test the capacitor with a multimeter. Replace if swollen or leaking. This is a 10 minute task. If the motor keeps humming and won’t start, it may need to be lubricated or replaced.
But start with the basics. Most fans aren’t broken. they are just confused. They are trying to heat your house in July. Flip the switch. Feel the difference.
It’s strange that we are so dependent on machines that we don’t understand. It adjusts speed but not direction. Clean the dirt, but not the screws. The fix was there all along. It’s hiding in plain sight. On the side of the motor. It’s a little plastic slider. that’s it.
Check it out now.
You can keep your home cool without any effort. Mastering it requires some technical tweaks. If you turn it in the right direction and fine-tune the blade pitch, the fan will work as efficiently as it should. The air flow is efficient, stable and directed exactly where you need it. These are not complicated fixes. These are DIY steps that provide free solutions to common household problems.
But before declaring victory, a final diagnosis is needed. Confirm your work. Make sure the installation is secure so you can enjoy the wind without being disturbed.
Check the directional switch and clearance
Let’s start with the basics. Check the metal case for profiled button. It should be placed in a suitable position depending on the season. During the cooling phase, the blades must push the air downwards. This creates a wind-chilling effect. If it’s winter, you need the reverse setting to circulate the warm air near the ceiling. Make sure the switch is securely in place.
Next, let’s look at physical spacing. Measure the gap between the upper mount and the base. There should be no friction. No scraping. If the fan wobbles, it may not be level or the blades may be misaligned. Tighten the fasteners. There must be no play in the structure. This eliminates the annoying clicking sound that can ruin the quiet hum of a good fan.
Clean and Balance for Silent Operation
Dust is the enemy of efficiency. A layer of dirt on the blade increases its weight. It creates resistance. It also throws off the balance. Thorough cleaning of the edges reduces the load on the motor. The fan spins more easily. Consumes less energy. Air flow moves through the room more efficiently.
Wipe down all surfaces. Use a damp cloth to clean the blade. A microfiber cloth works best for the housing and the switch. It removes the accumulations caused by months of inactivity.
Final Checks Before Summer Hits
Do not skip these steps. It only takes a few minutes, but it can prevent future headaches.
- Confirm the switch position. ** Make sure it is locked in the forward setting for cooling.
– Measure the gap. **Make sure there is enough space between the mount and the base to prevent vibration. - ** Tighten all screws. ** Check each fixed point. Over time, vibration can loosen the hardware. Secure them to prevent rattling.
-** Deep clean the blades.
** Remove dust to reduce weight and air resistance.
Flip the switch and adjust the pitch to reveal the true potential. It is more than just decoration.
The solution to your summer comfort problems is often right in front of you. You just have to look in the right direction.
Get a screwdriver and a rag. Check your setup in your living room before the temperature peaks. What happens if we ignore the wobble now? The motor works harder. The cooling will drop. Let’s start small. Let’s start by checking.